Two worked examples
Each step shows where to press. The pink ring is the pointer.
A durian coin bank
A sentence becomes a coloured model you can download. It costs 44 credits and takes about 6 minutes.
Click the prompt box
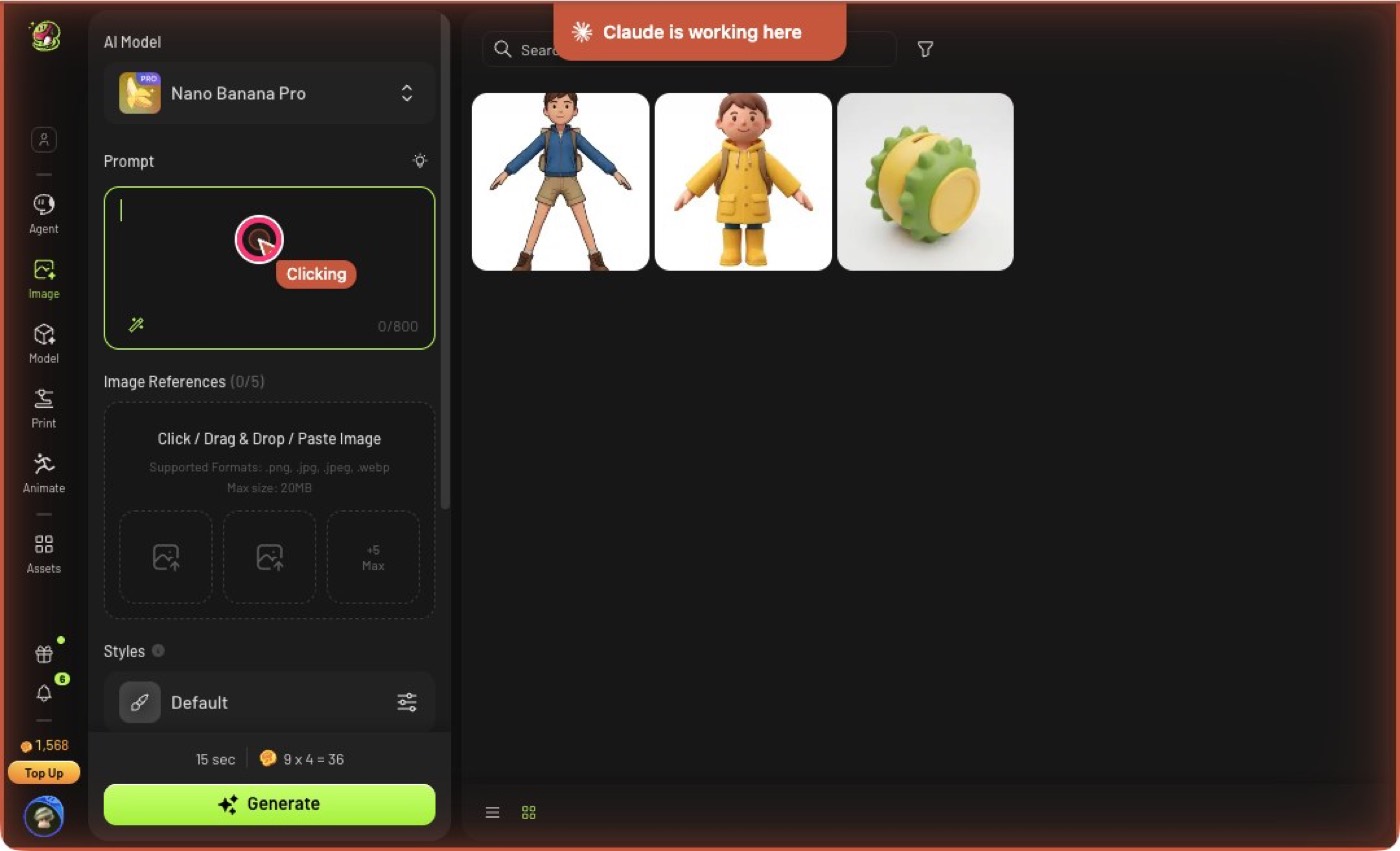
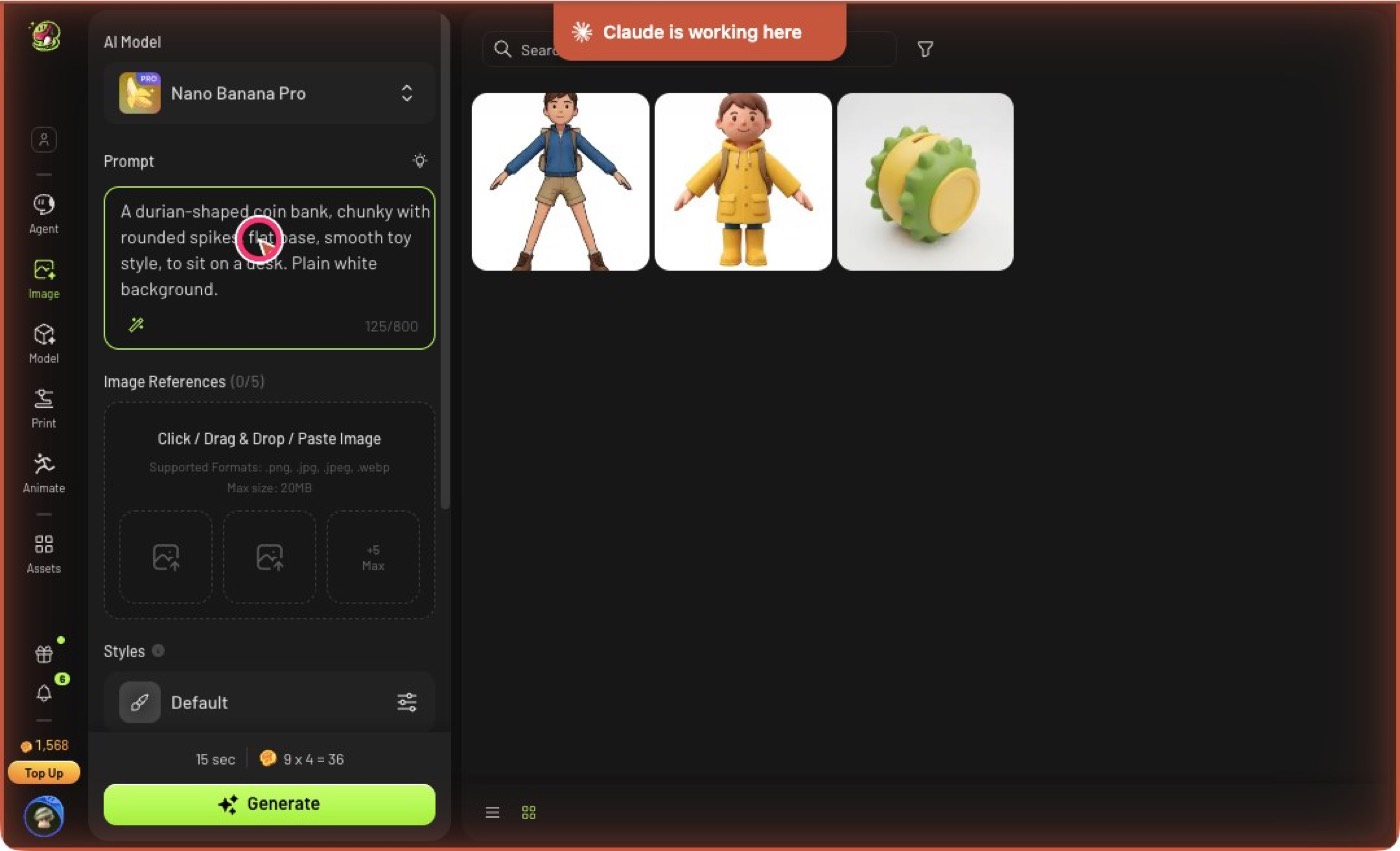
Type the prompt
The prompt gives the object, its shape, the bottom, the style and the use, in that order.
The prompt used here
A durian-shaped coin bank, chunky with rounded spikes, flat base, smooth toy style, to sit on a desk. Plain white background.
Scroll down the settings
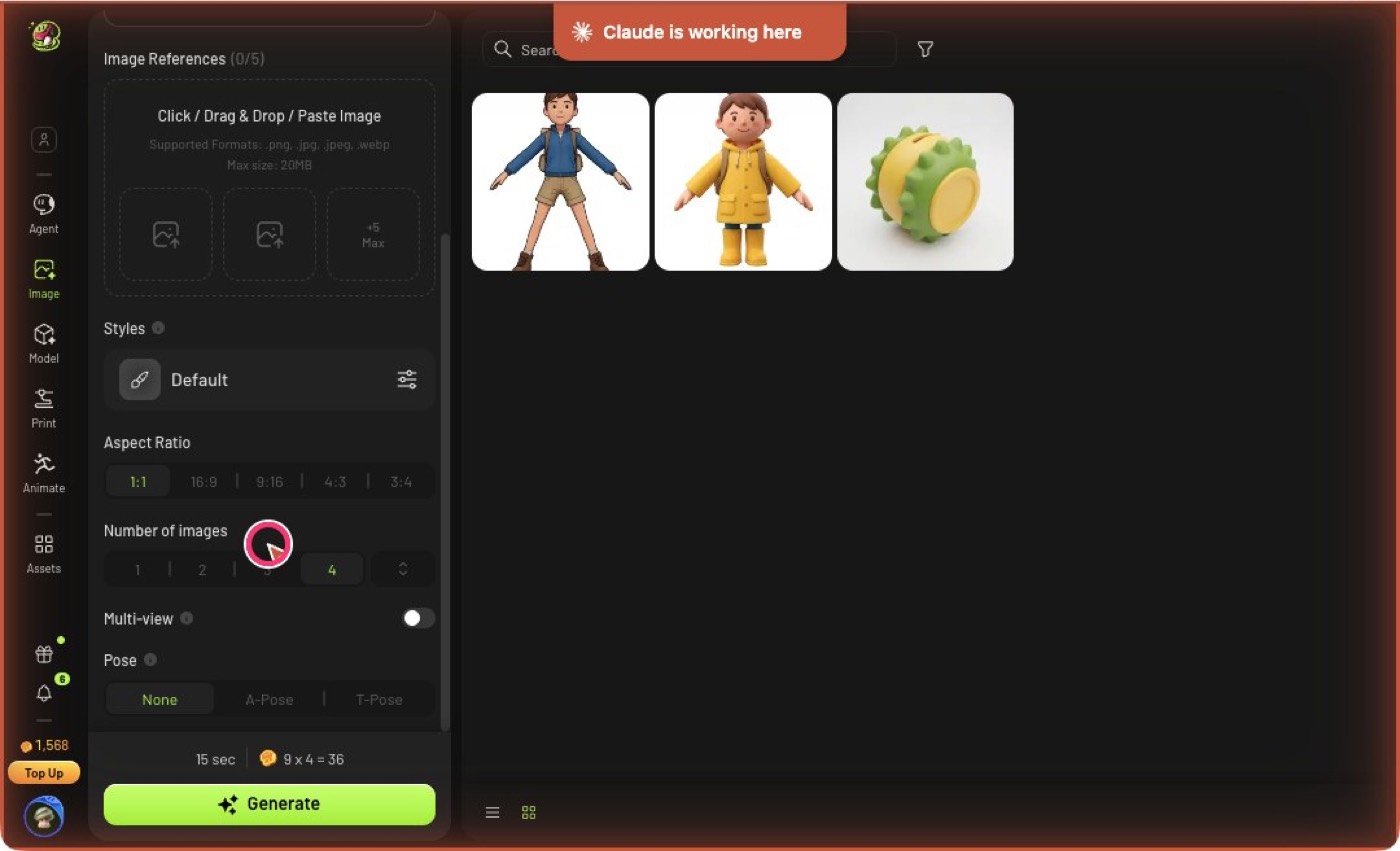
Set Number of images to 1
The default is 4 pictures for 36 credits. One picture costs 9.
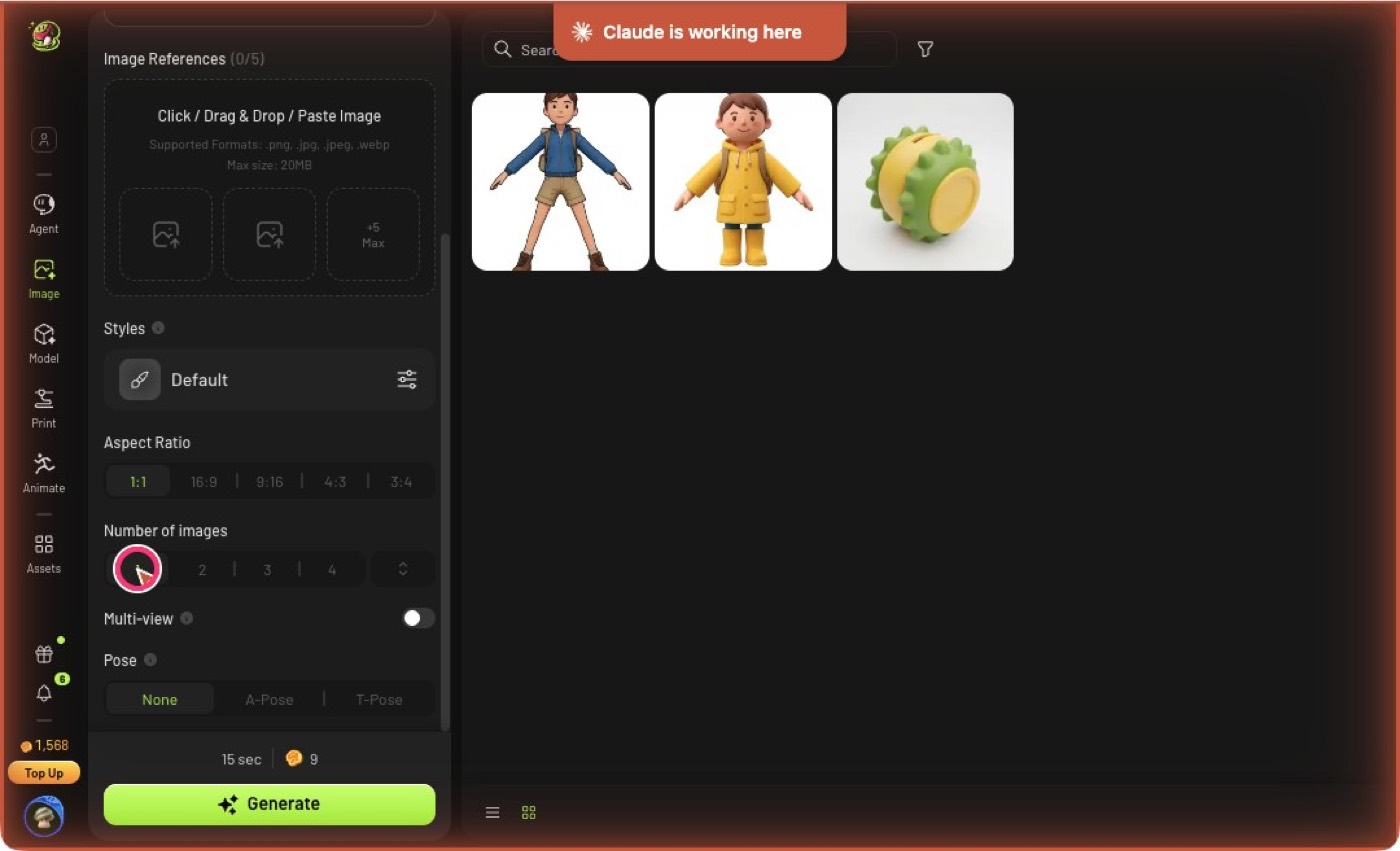
Press Generate (9 credits)
The picture took about 35 seconds.
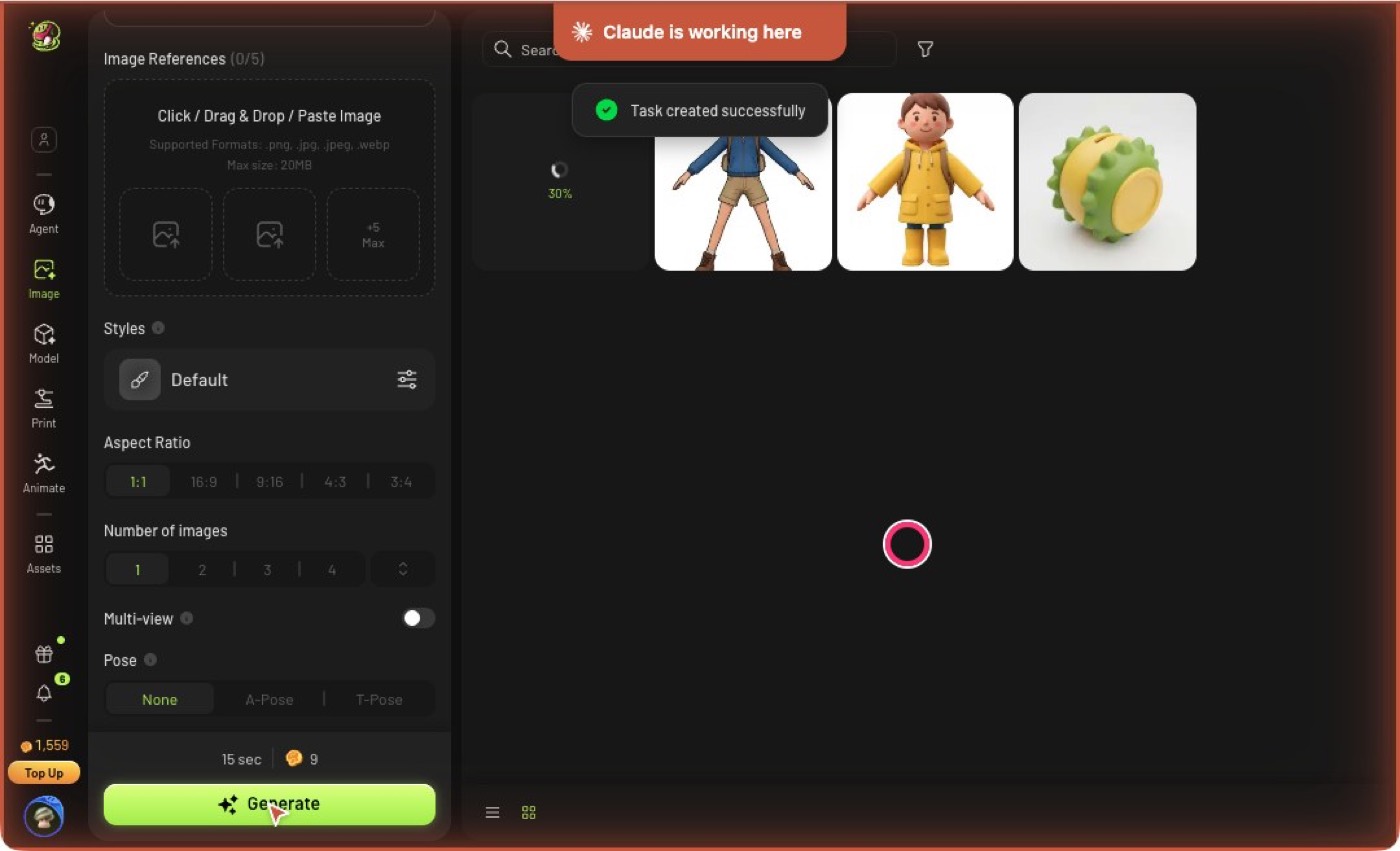
The picture arrives. Point at it
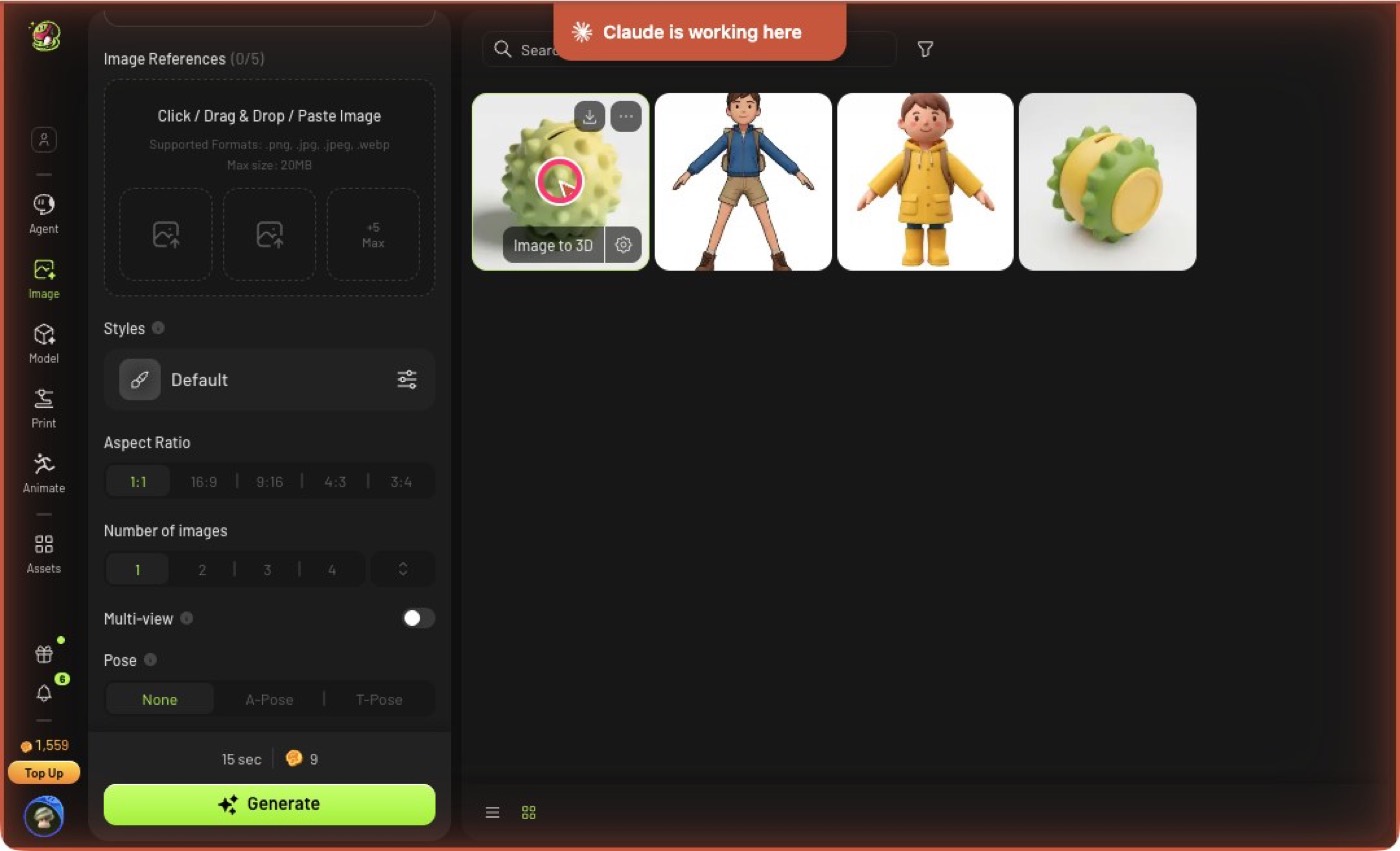
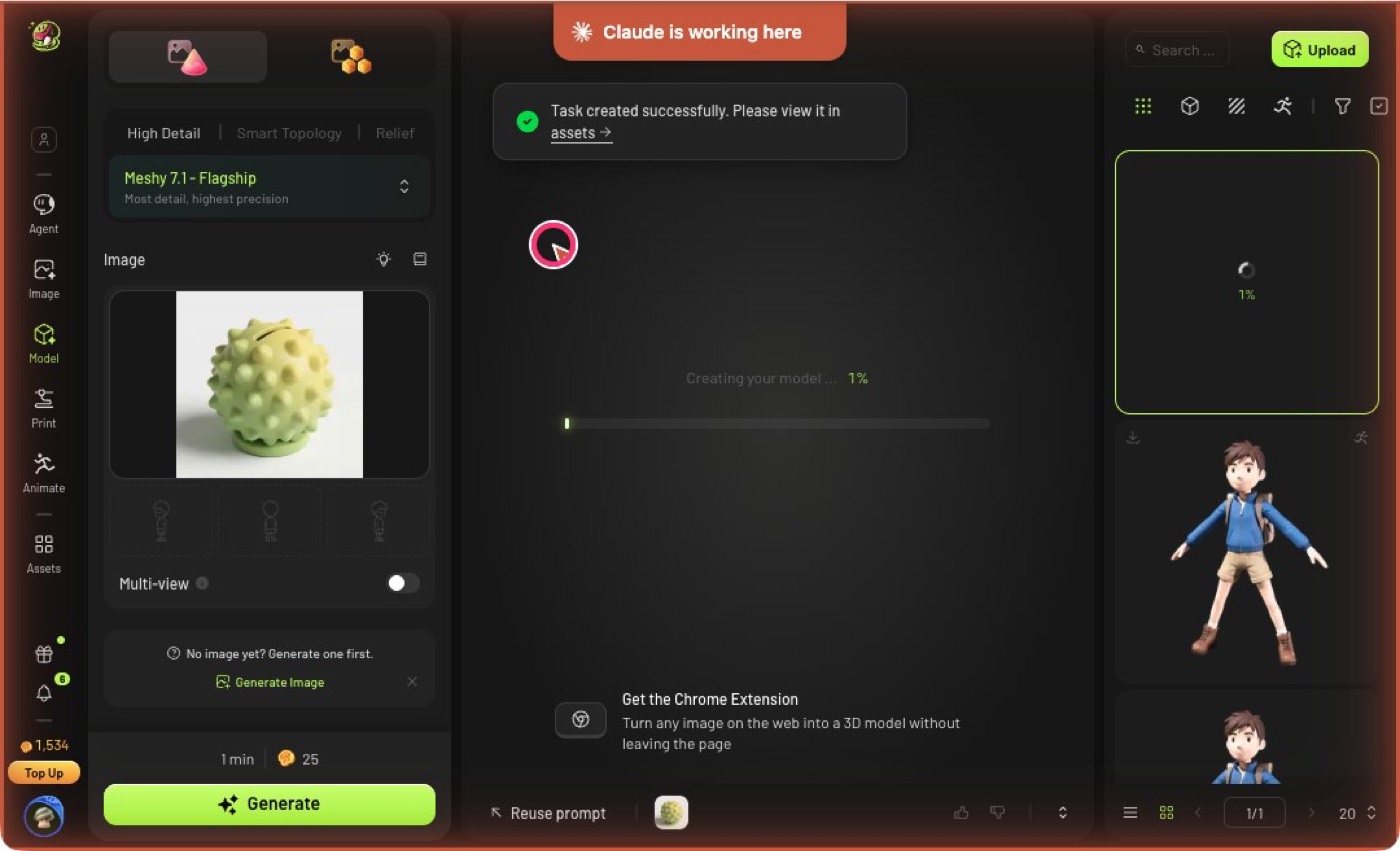
Press Image to 3D (25 credits, starts at once)
Meshy does not ask you to confirm, so the 25 credits are spent on this press. The model took about 80 seconds.
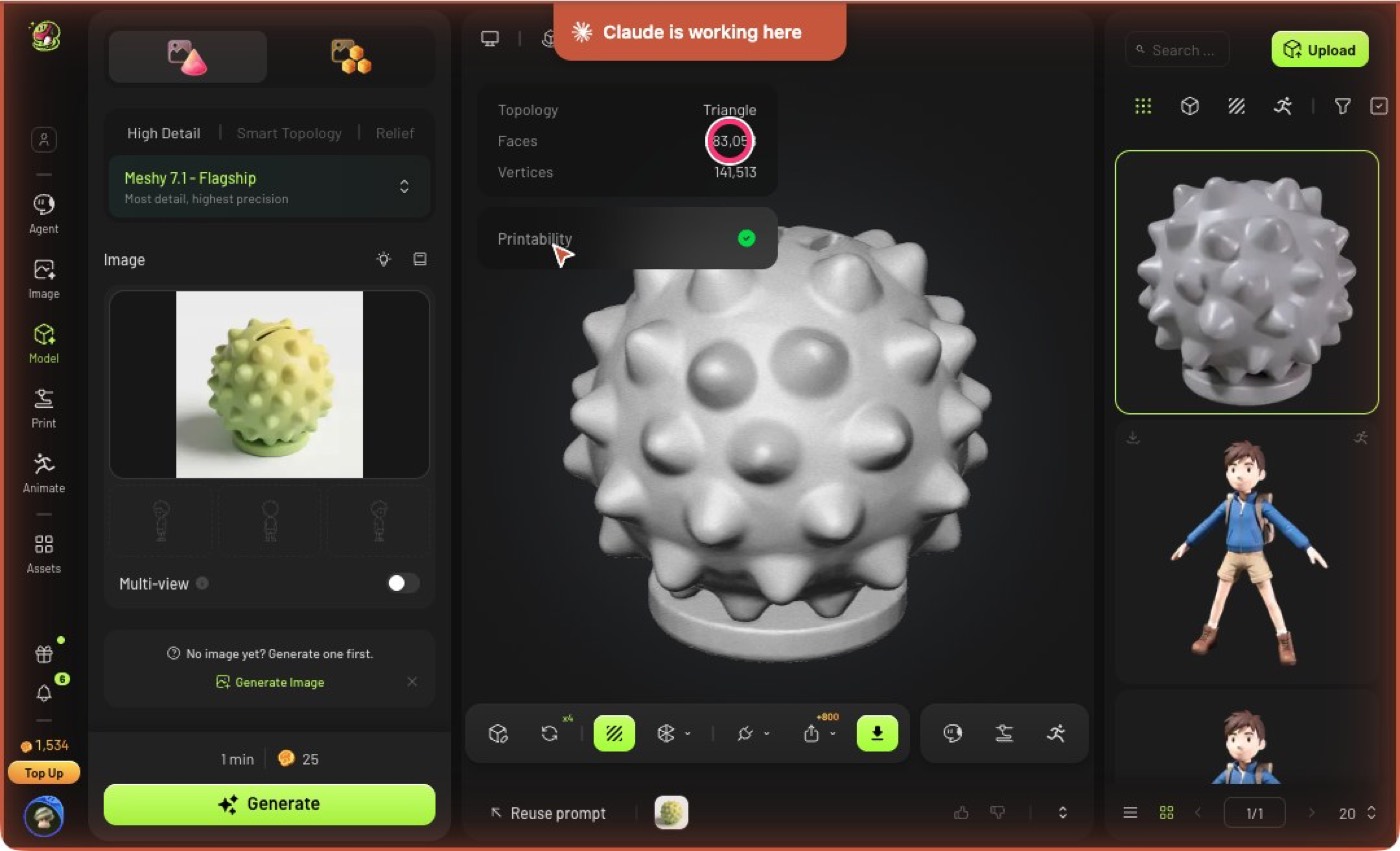
The model arrives grey. Read the face count
This one has 283,058 faces. The green tick means Meshy thinks it can be printed.
Drag to turn it. Check the back and the bottom
The bottom is flat, as the prompt asked.
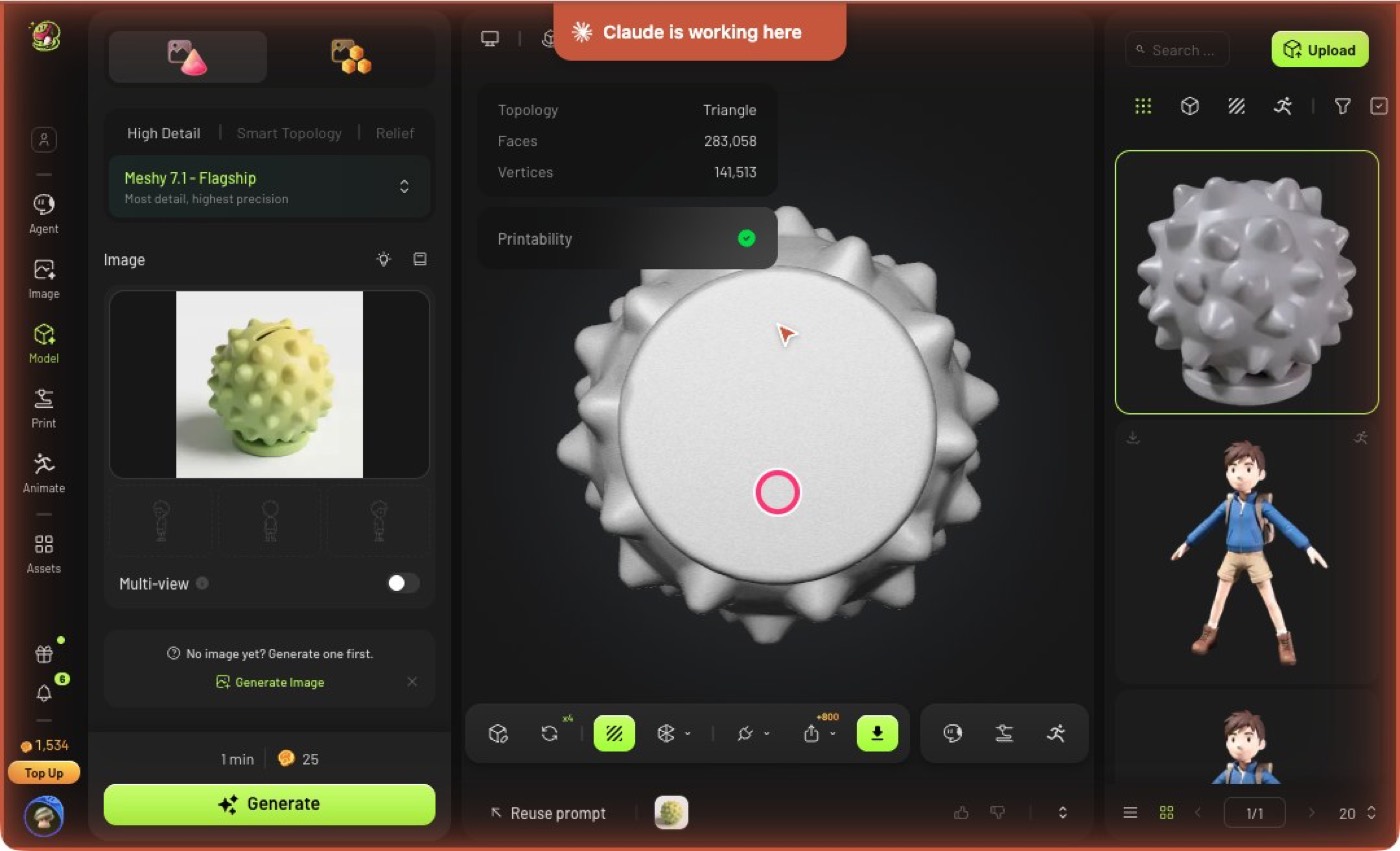
Press the globe to see the wireframe
Every small triangle is one face. Press the globe again to turn it off.
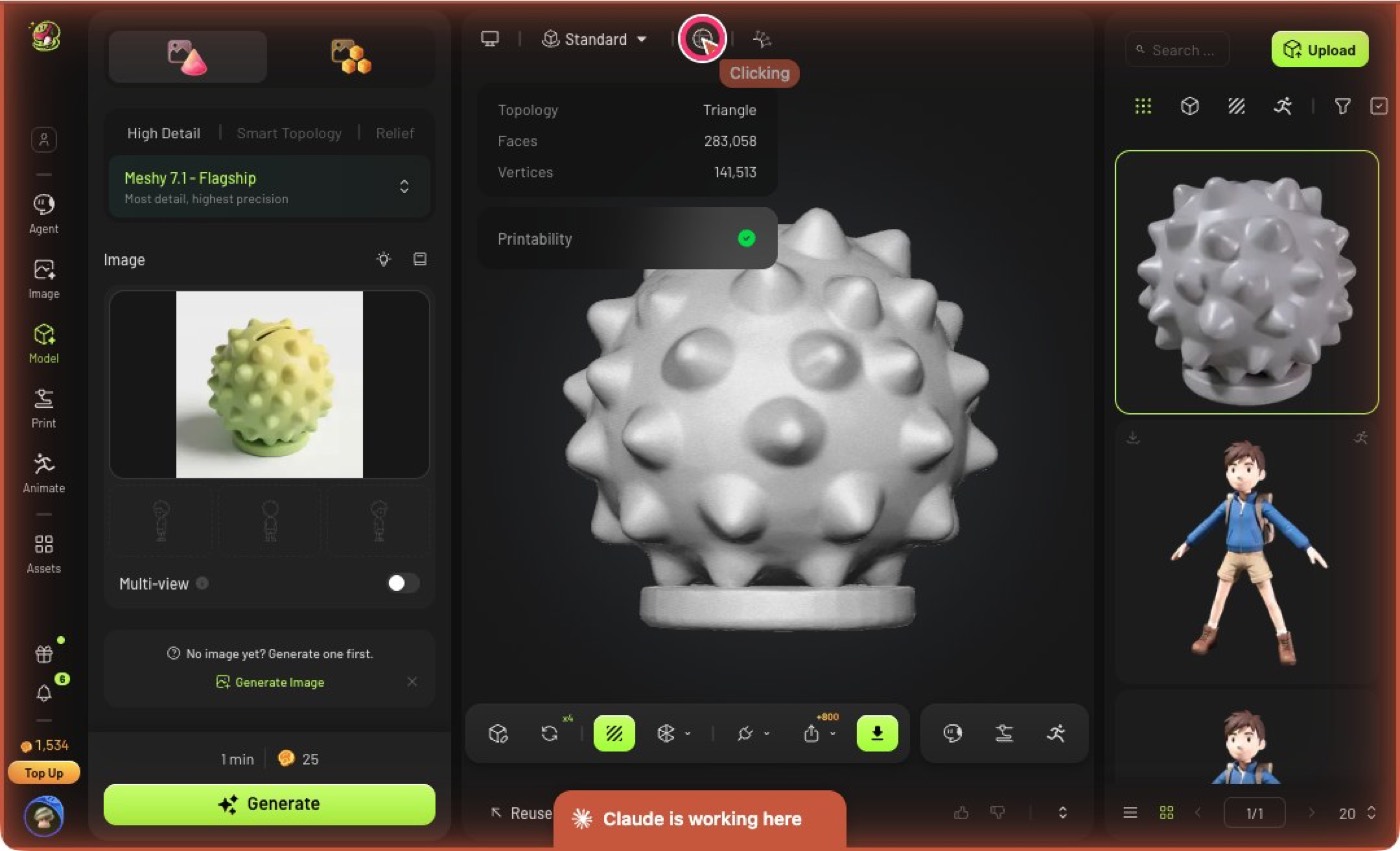
Press Texture to add colour
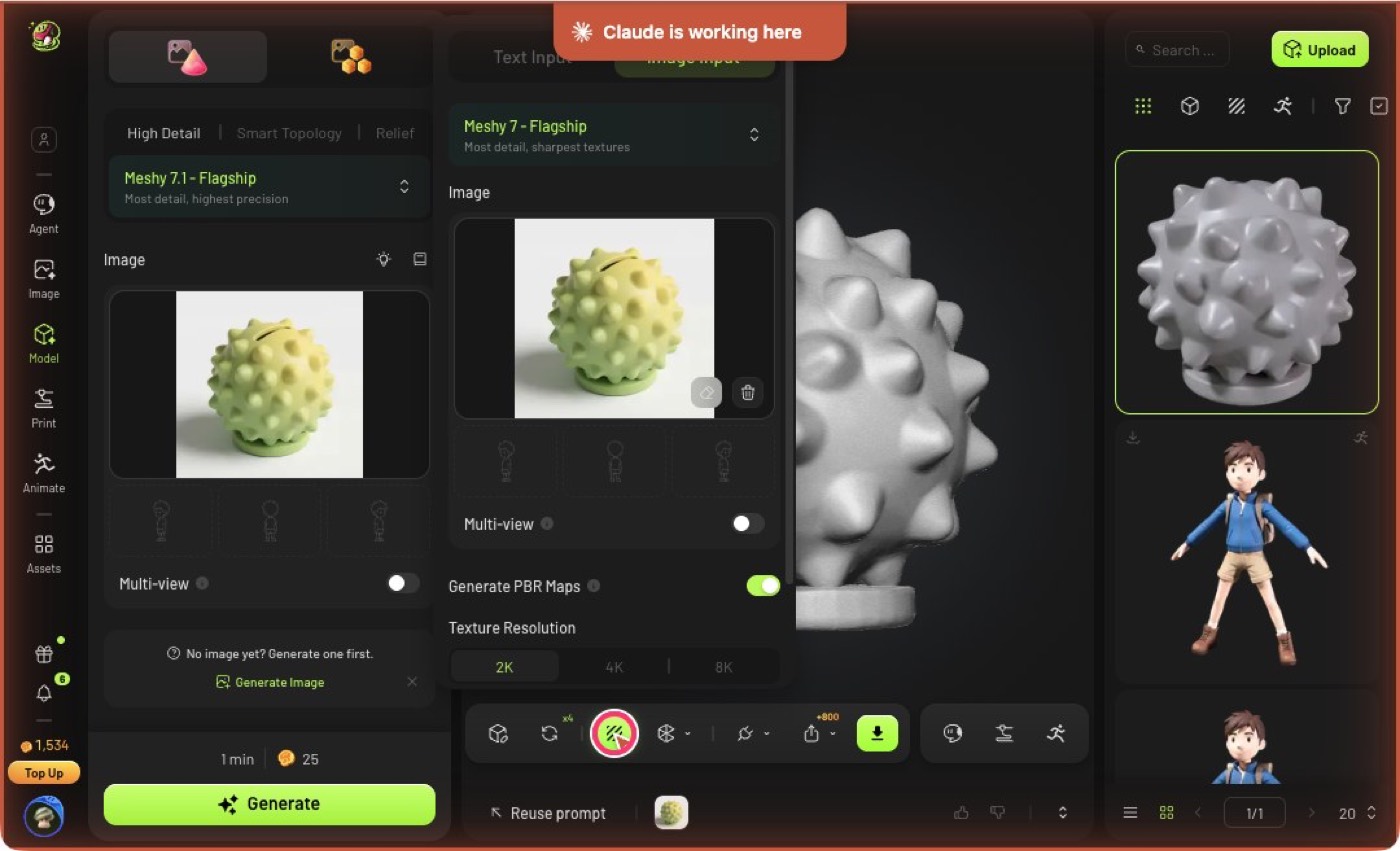
Scroll down and press Texture (10 credits)
Colour took about 65 seconds.
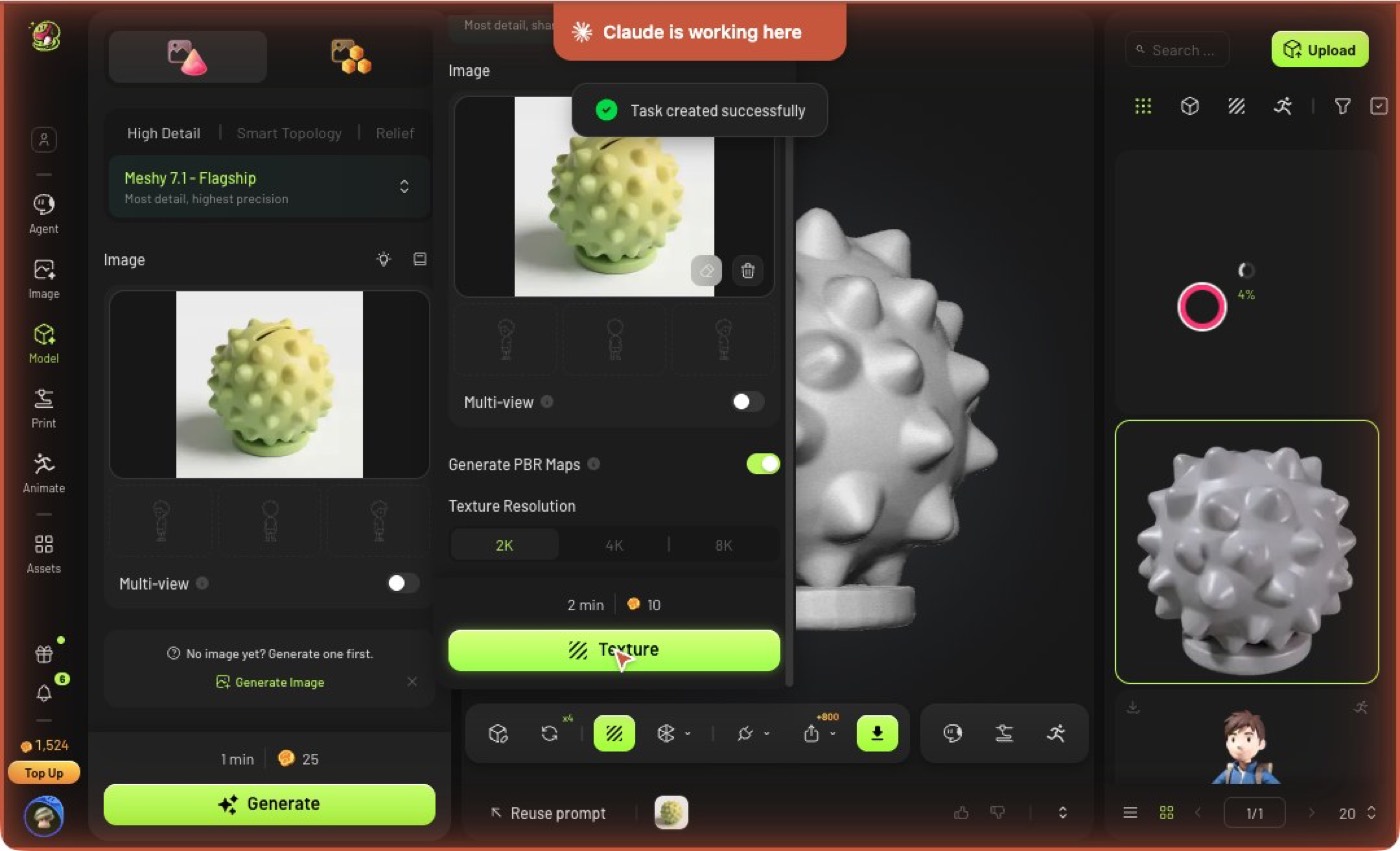
The coloured model is a new item. Open it
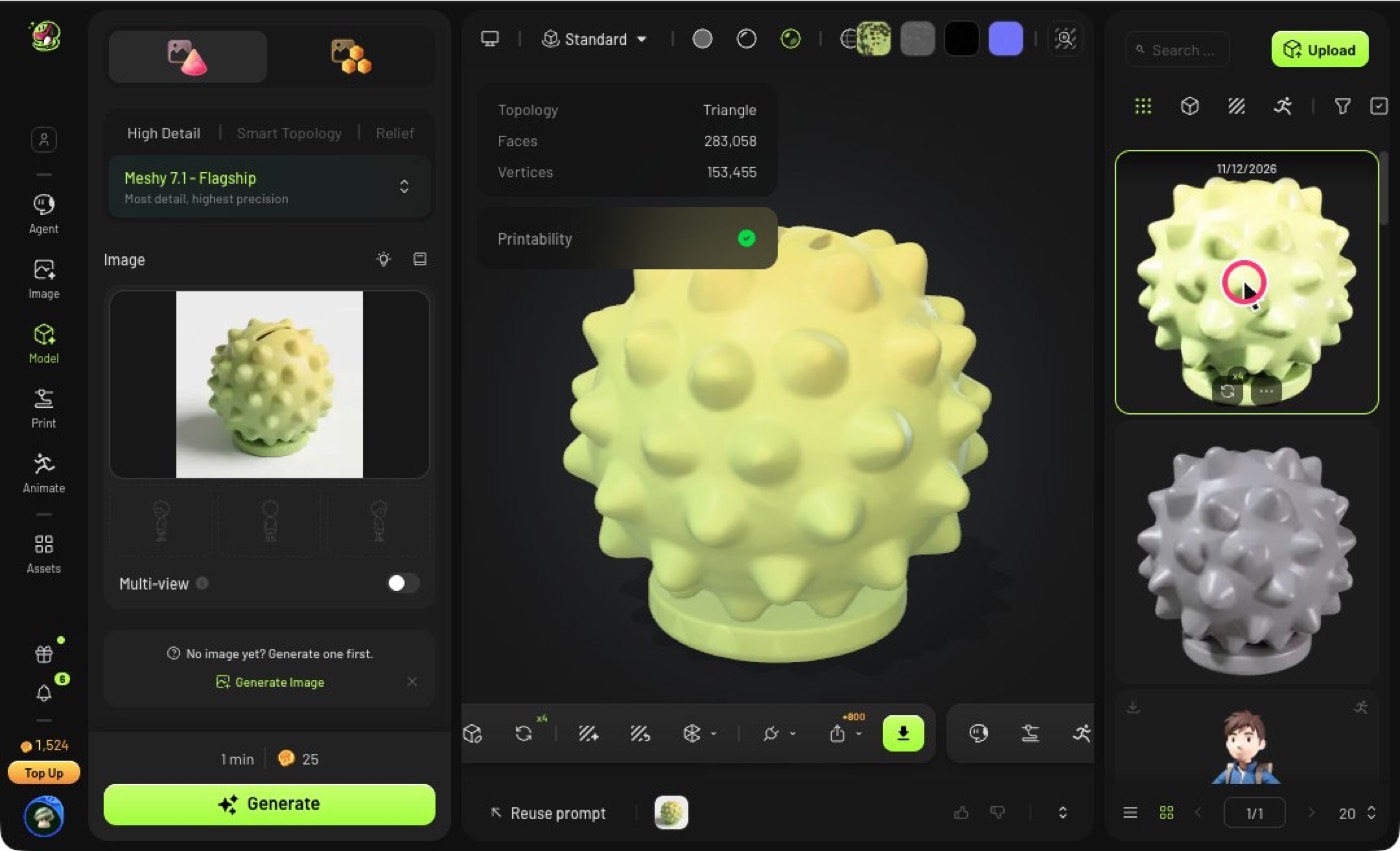
Turn it again and look for one problem
The problem here: the AI made two coin slots, and one is crooked. The picture showed only one.
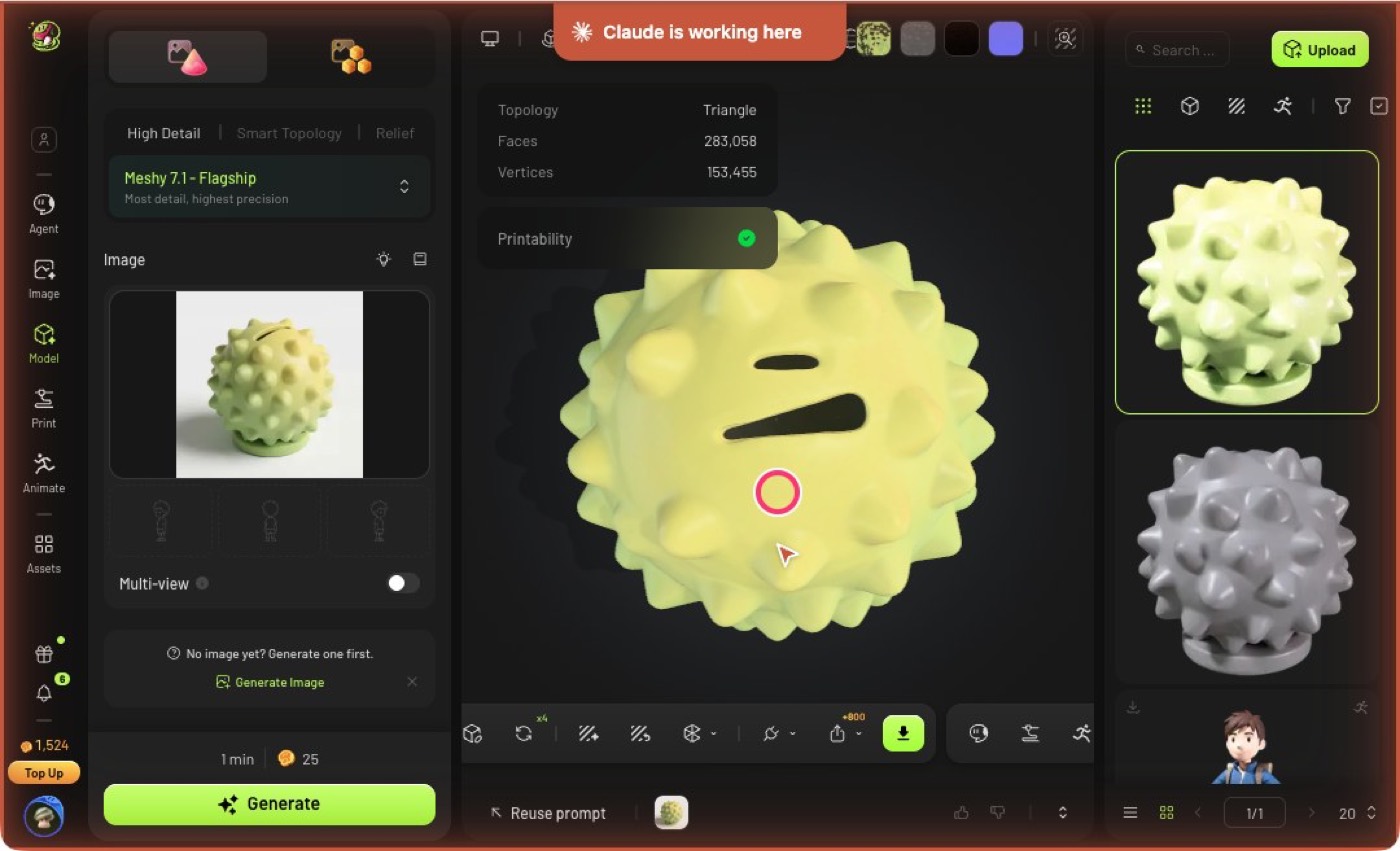
Solid Mode hides the colour so you can judge the shape
Without colour, the two slots are easier to see. This is what to write in note 4.
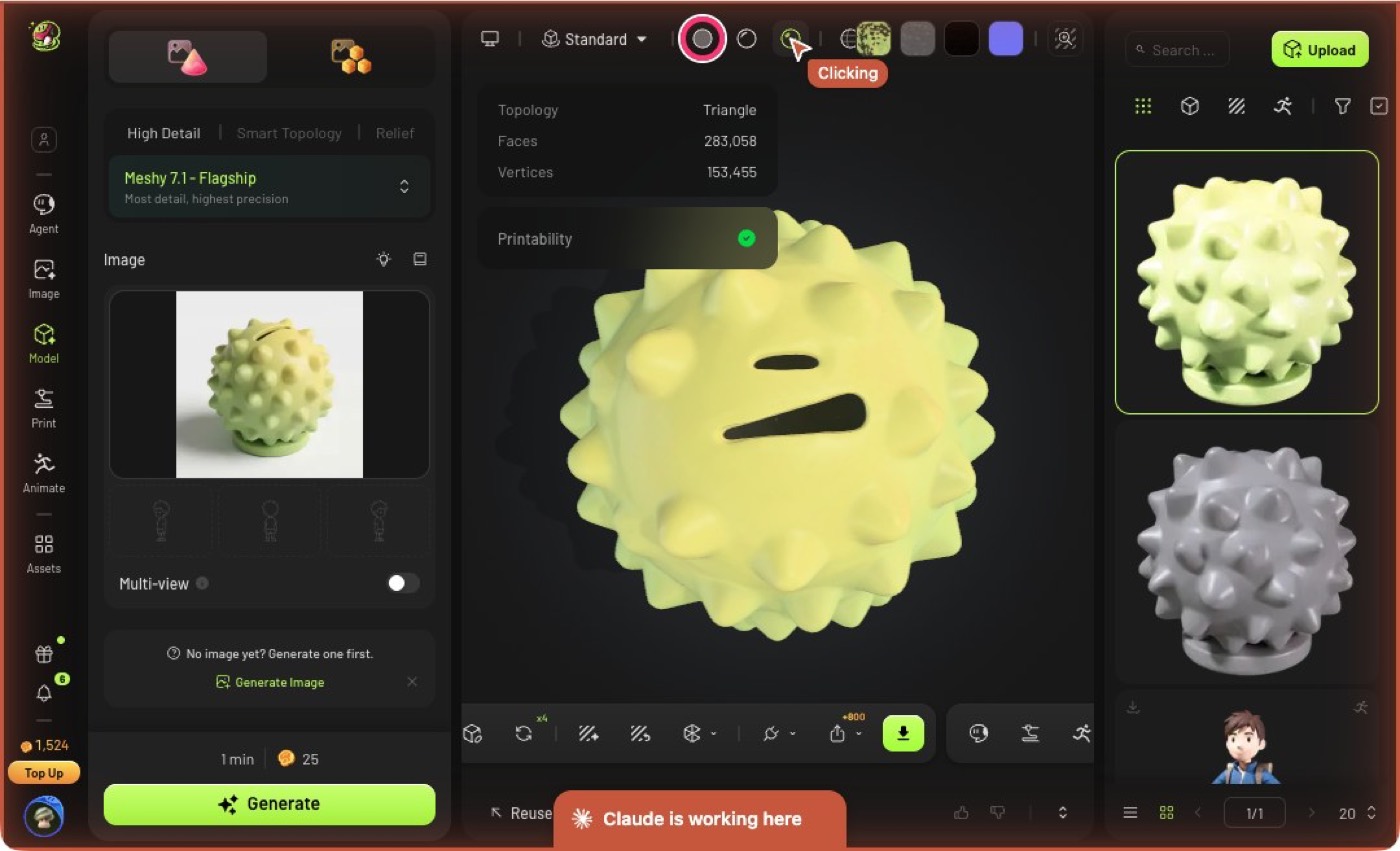
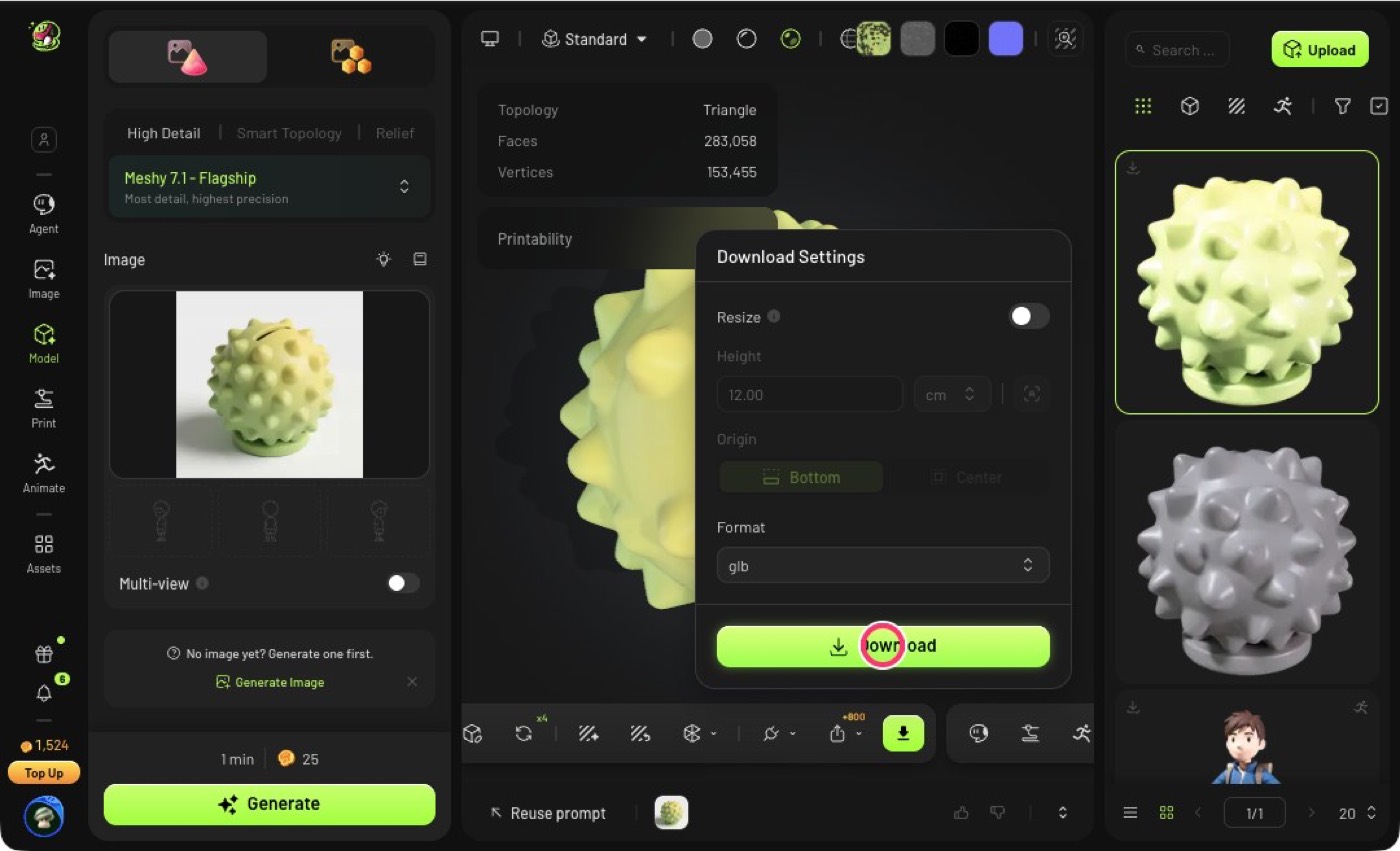
Press the green download button
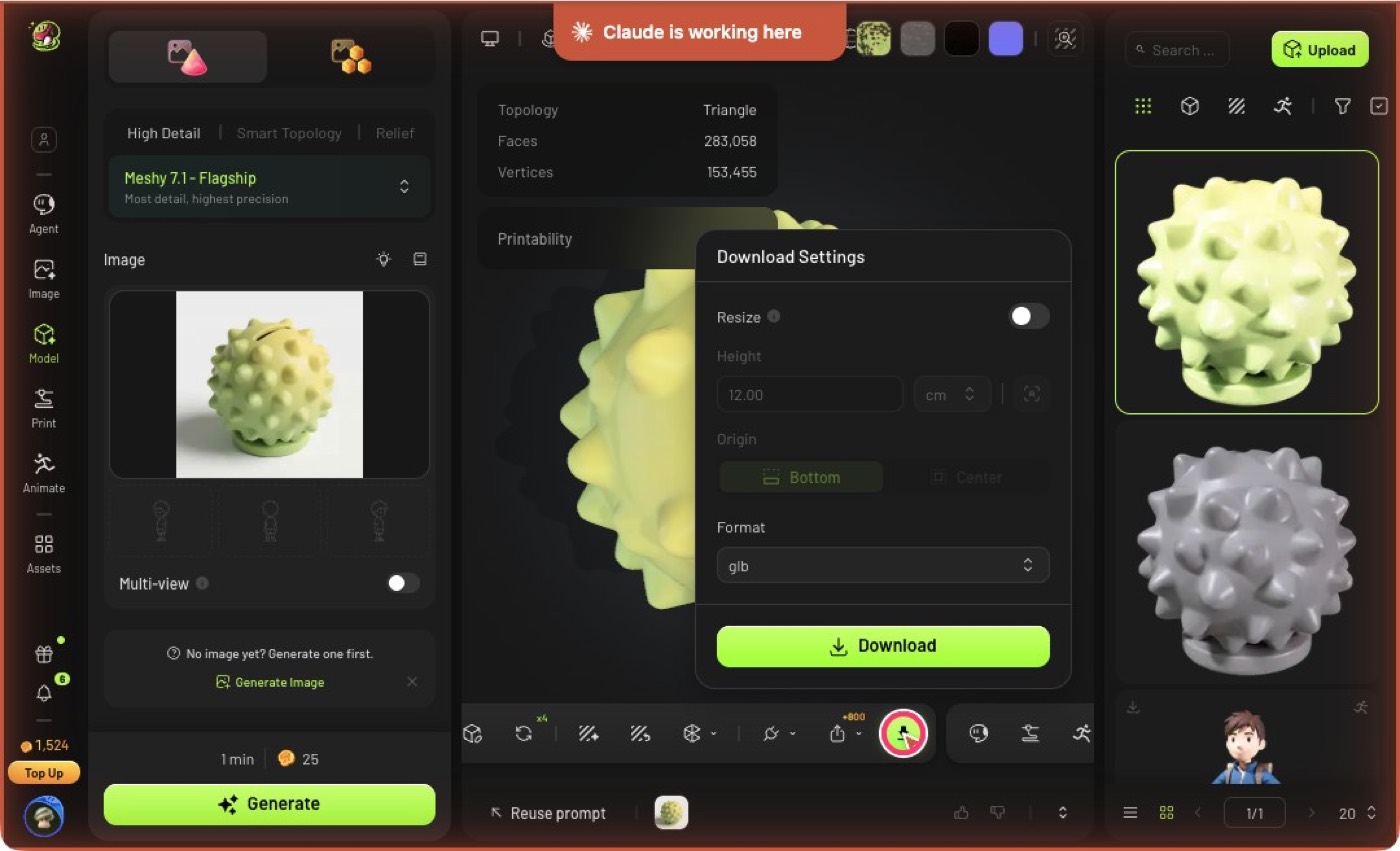
Keep the format glb and press Download
The file arrives in the browser's download folder. This one is 11.8 megabytes.
An explorer who walks
The same steps as the durian, followed by a skeleton and a motion. It costs 44 credits and takes about 11 minutes.
The finished character:
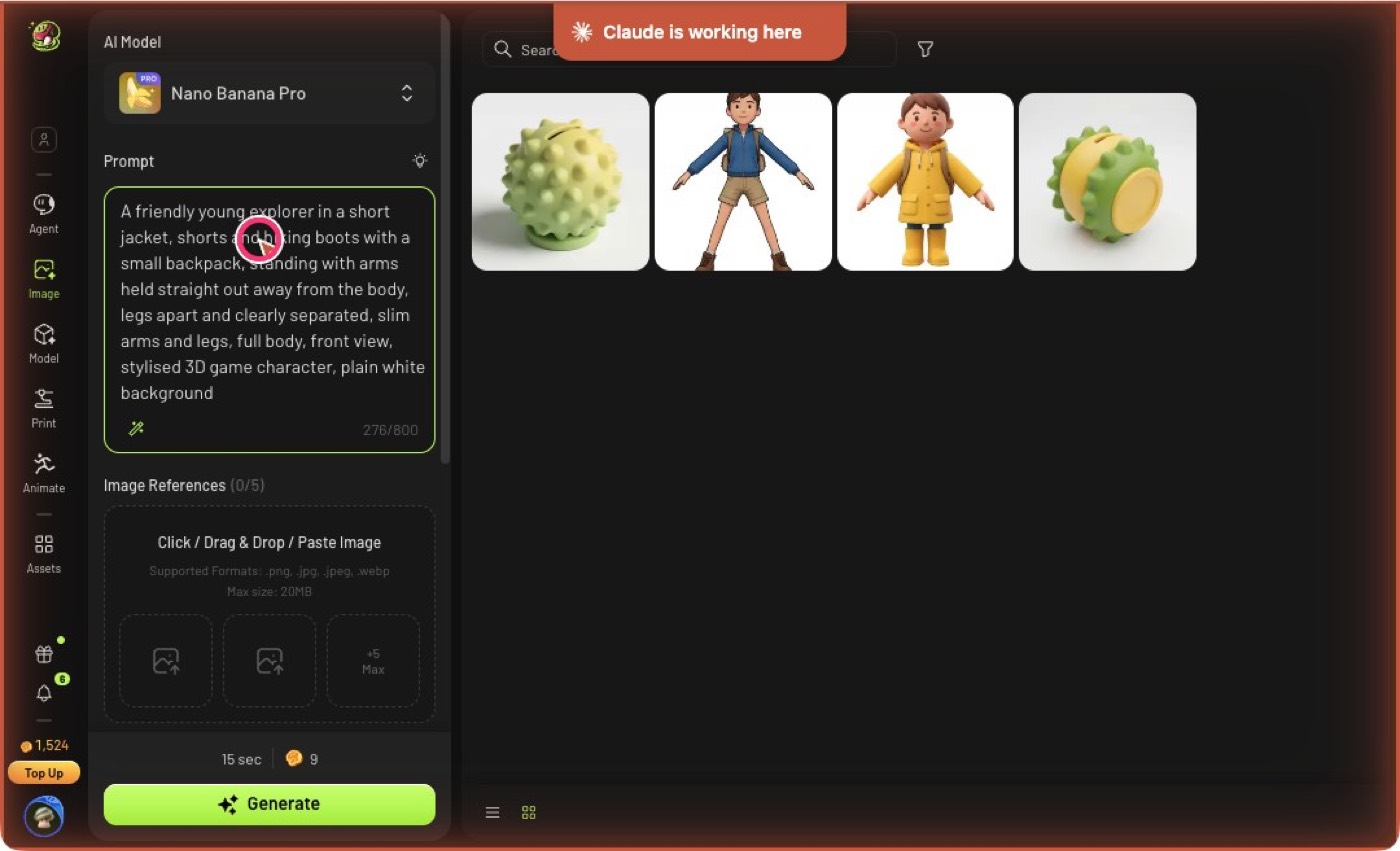
Type a prompt for a character. Ask for arms out and legs apart
The prompt used here
A friendly young explorer in a short jacket, shorts and hiking boots with a small backpack, standing with arms held straight out away from the body, legs apart and clearly separated, slim arms and legs, full body, front view, stylised 3D game character, plain white background.
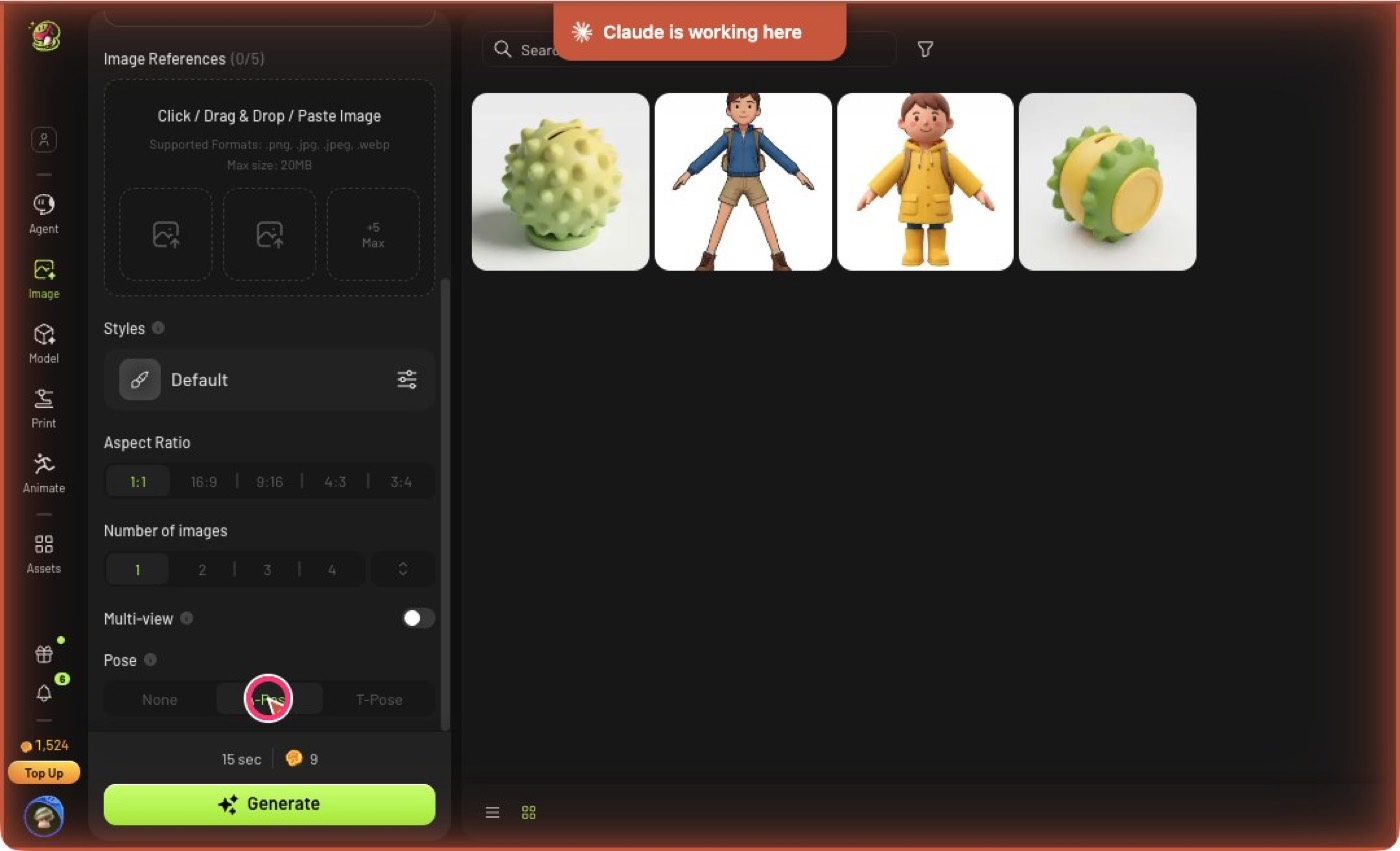
Scroll down. Set Pose to A-Pose. Keep Number of images at 1
A character with a long coat or arms against the body will not animate.
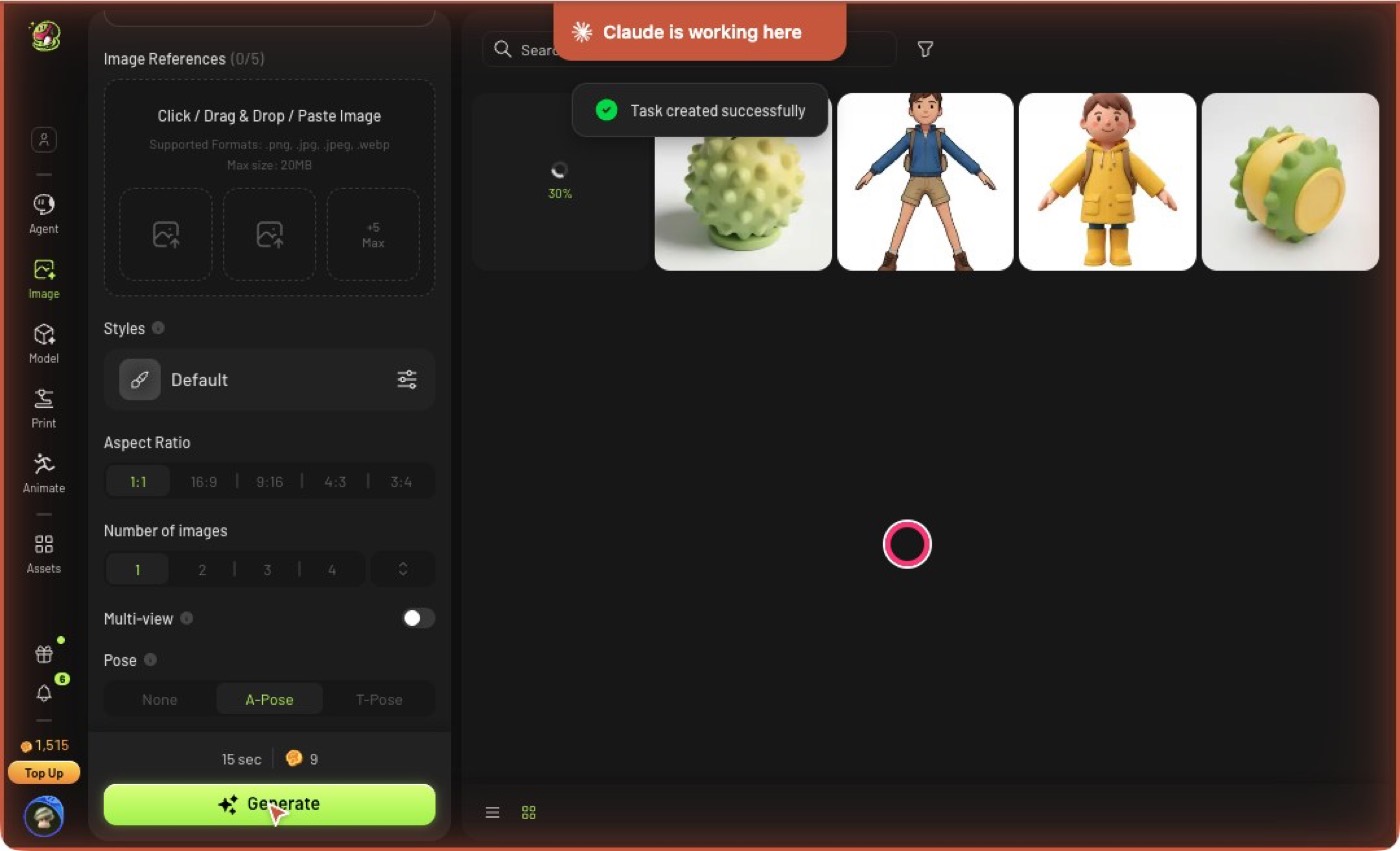
Press Generate (9 credits)
The picture took about 50 seconds.
Check the picture: arms away from the body, a gap between the legs
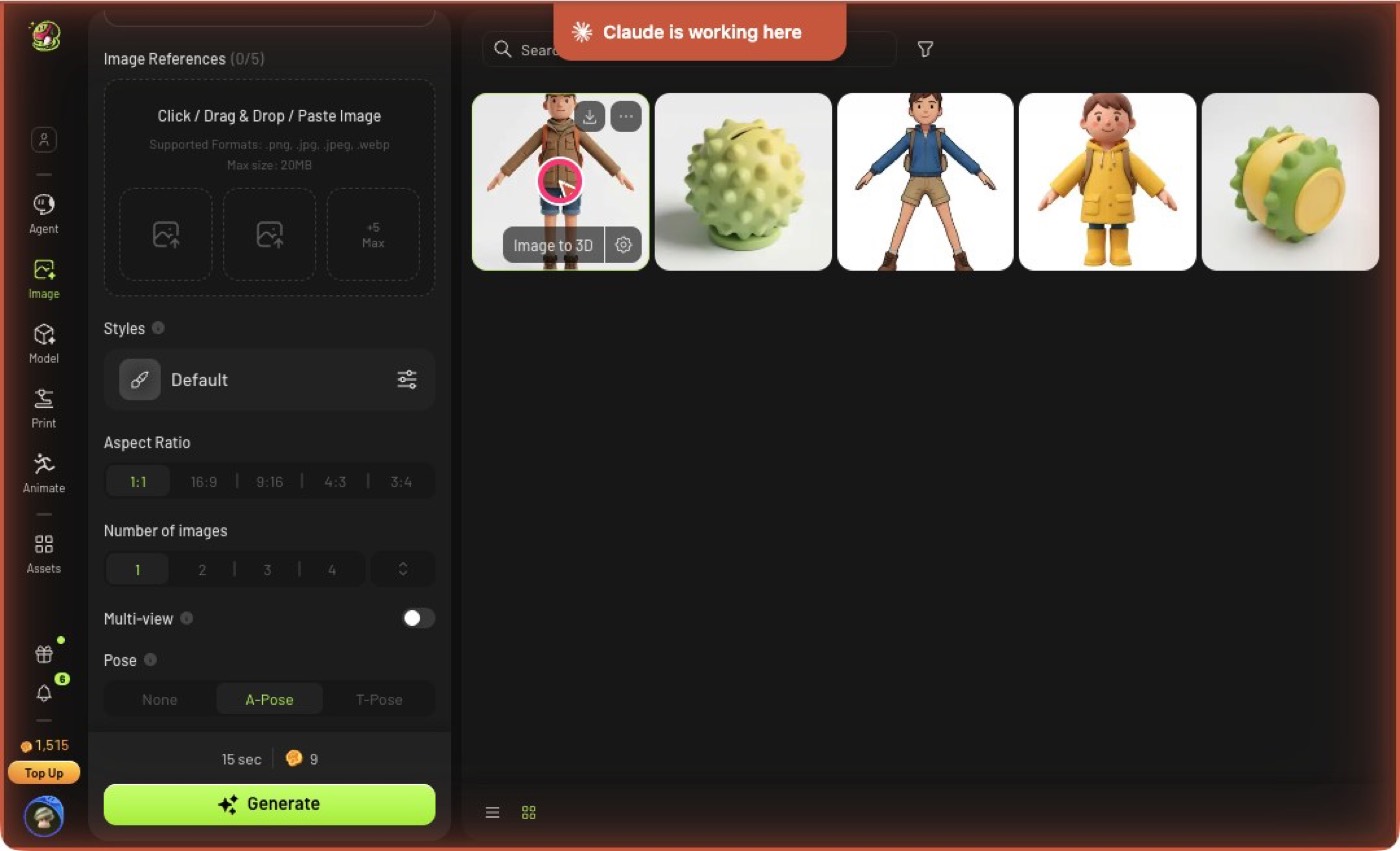
Press Image to 3D (25 credits)
The model took about 80 seconds.
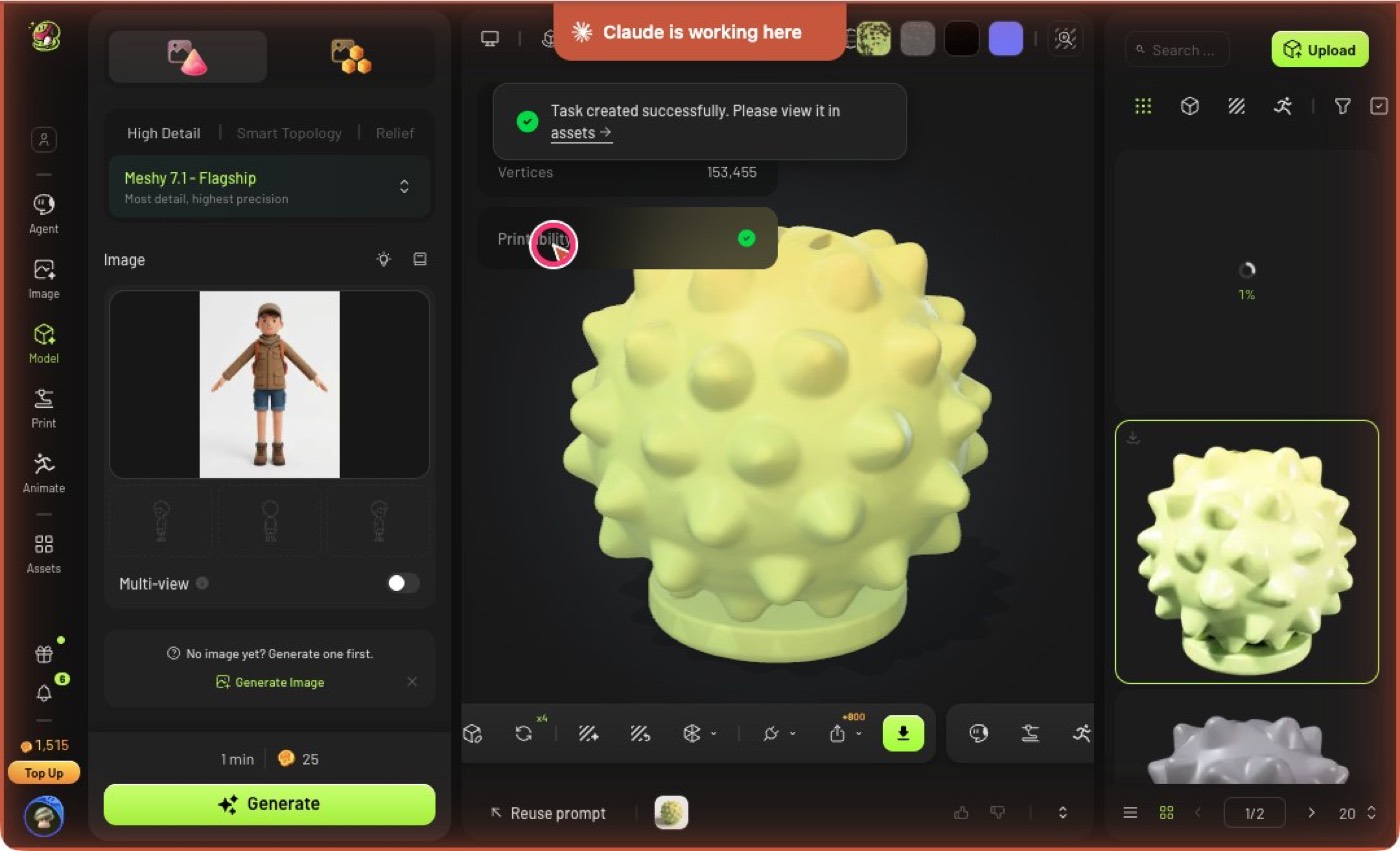
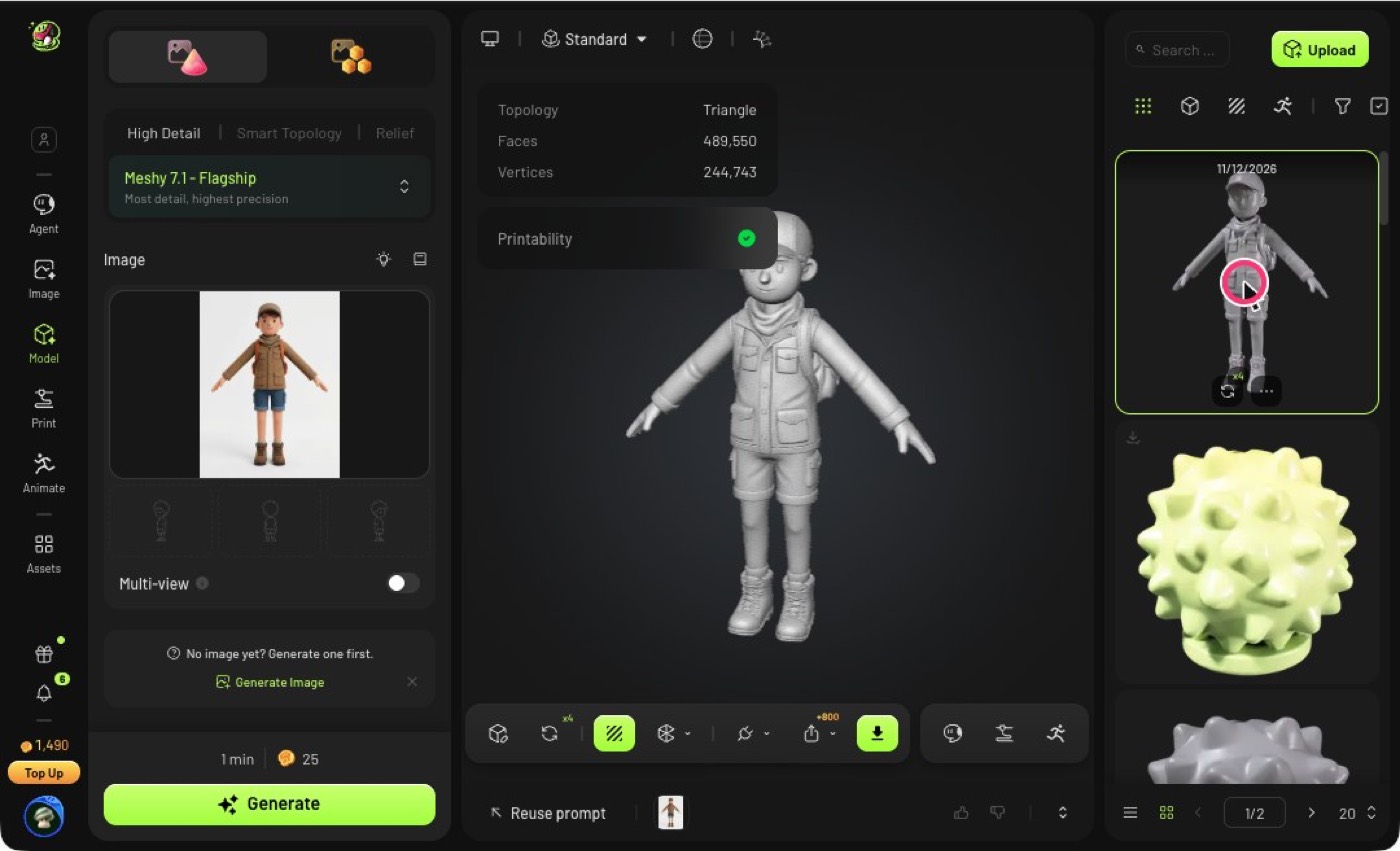
The grey model is ready. Open it
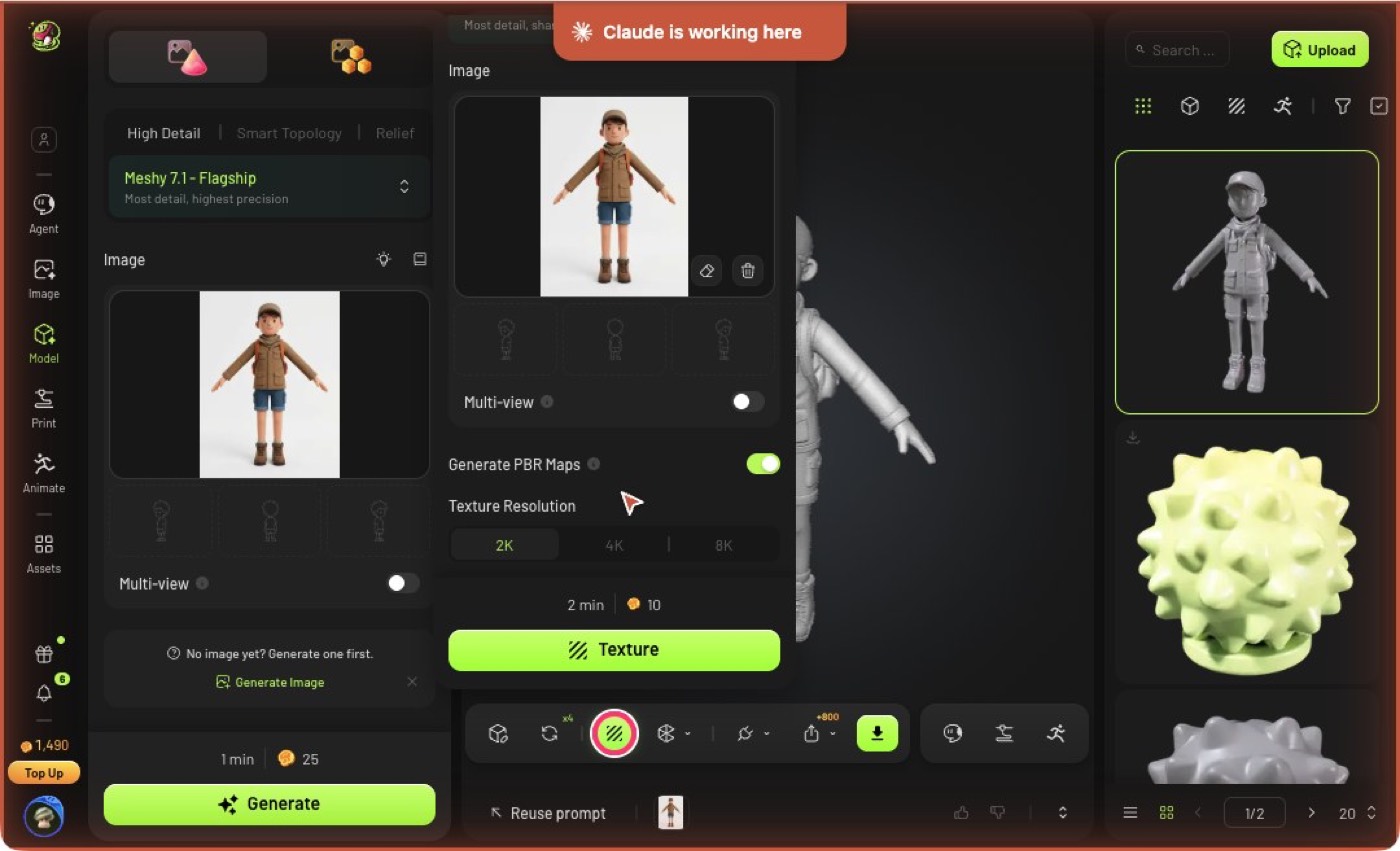
Press Texture, scroll down, press Texture again (10 credits)
Colour took about 85 seconds.
Open the coloured model
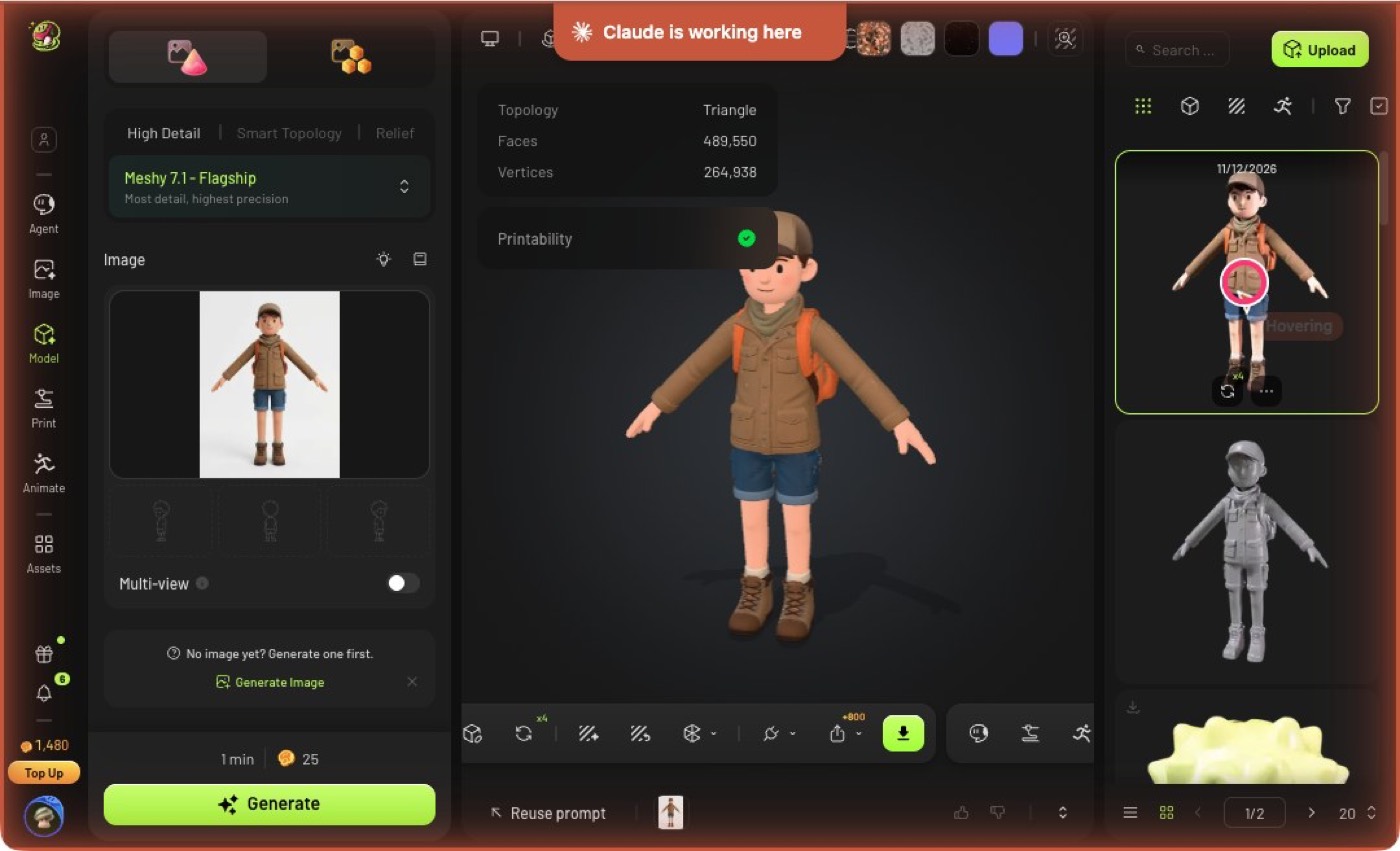
Press Animate, the running figure
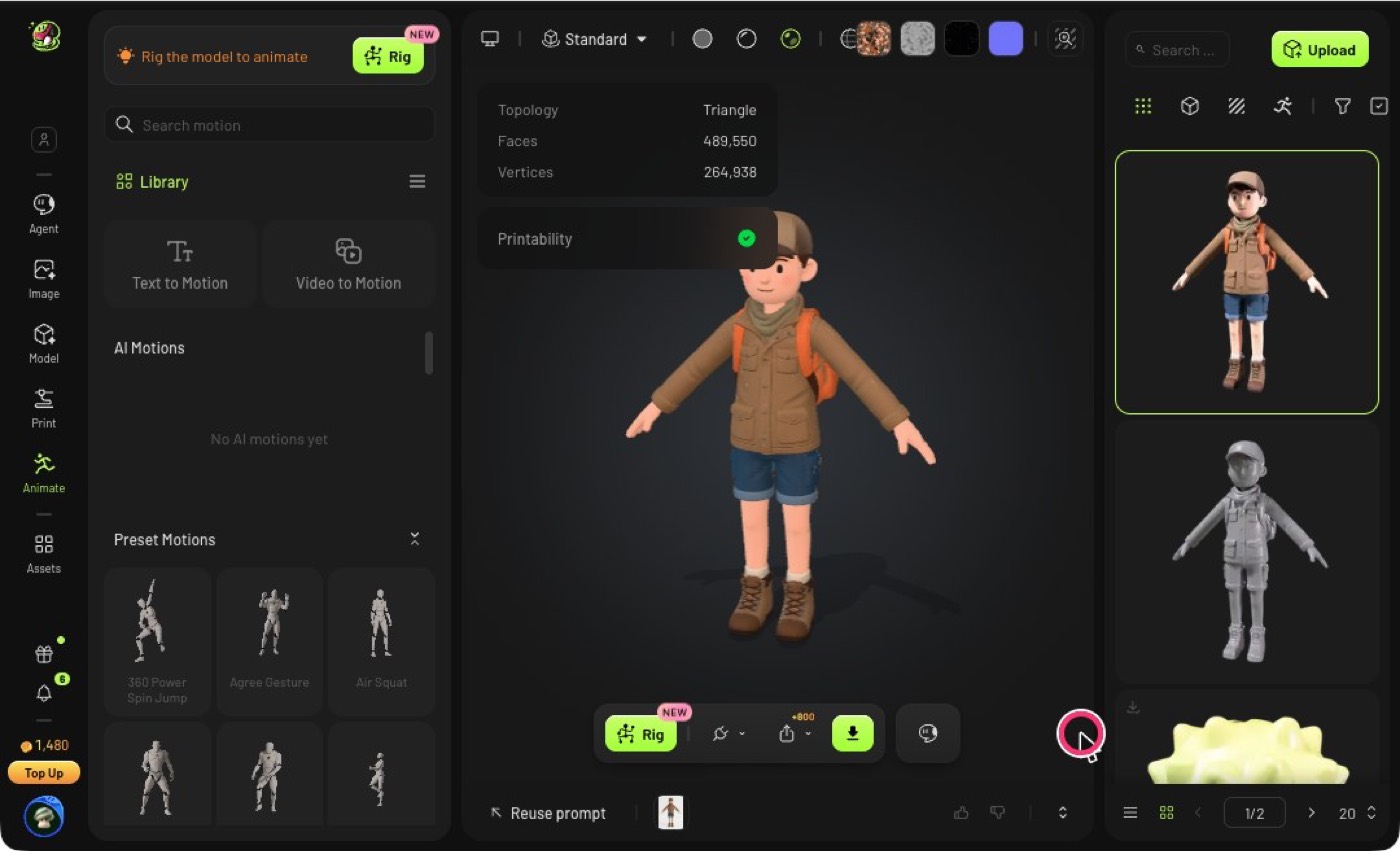
Press Rig to give the character a skeleton
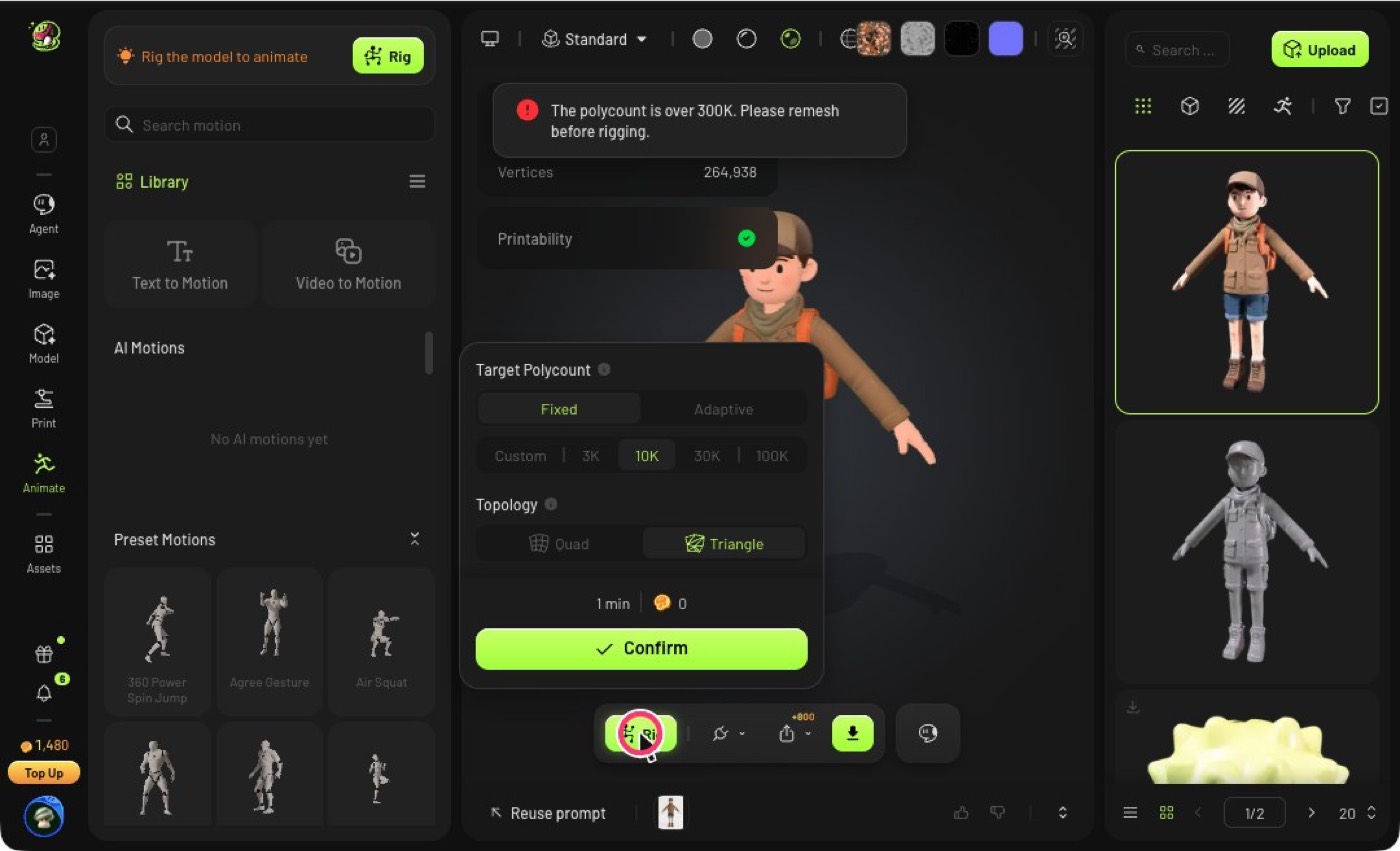
Too many faces to rig. Choose 30K and Triangle, then Confirm (0 credits)
This model has 489,550 faces and Meshy rigs only up to 300,000. The lighter copy took about 110 seconds.
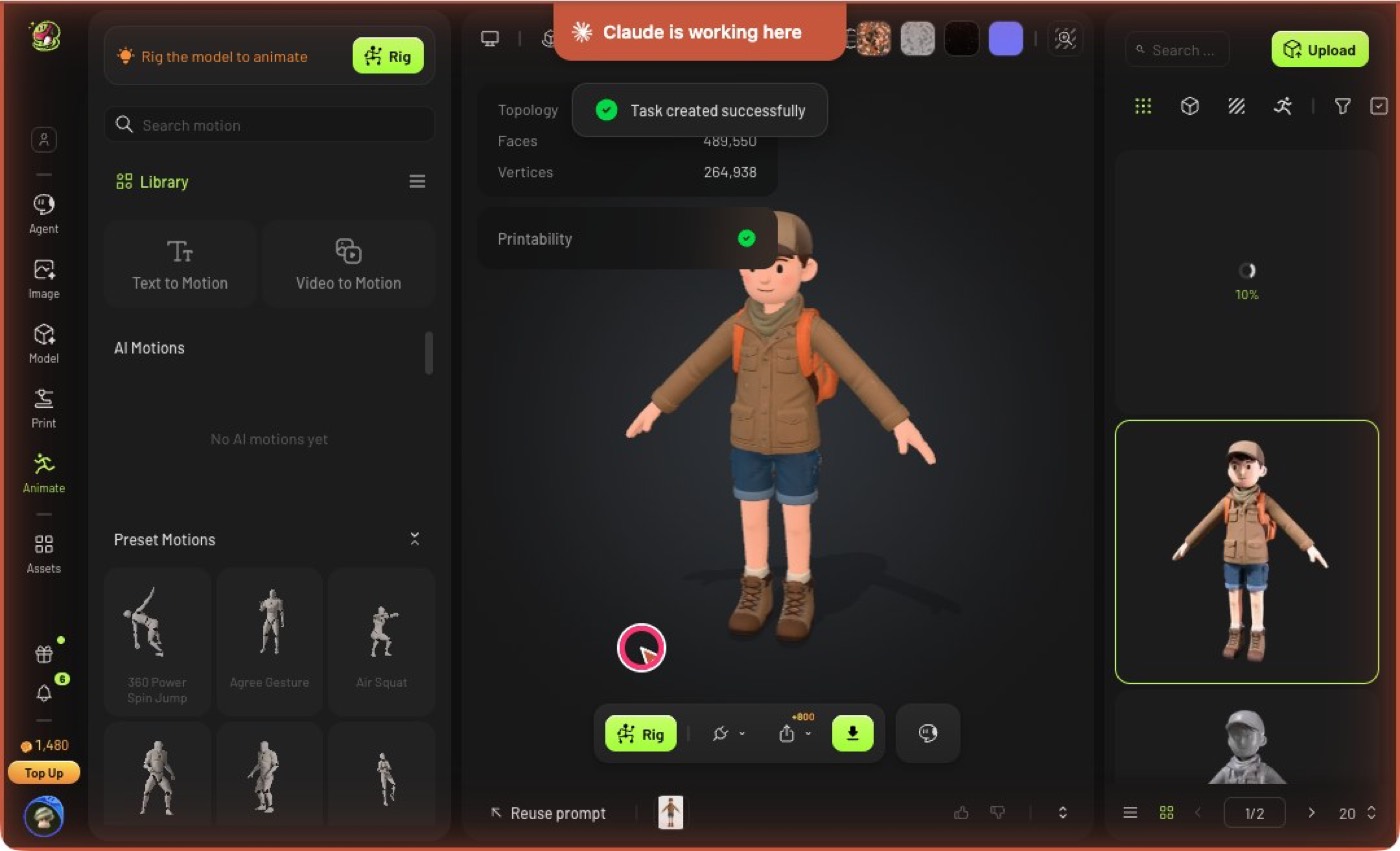
The lighter copy is a new item. Open it and read the face count
It now has 30,830 faces and looks the same from here.
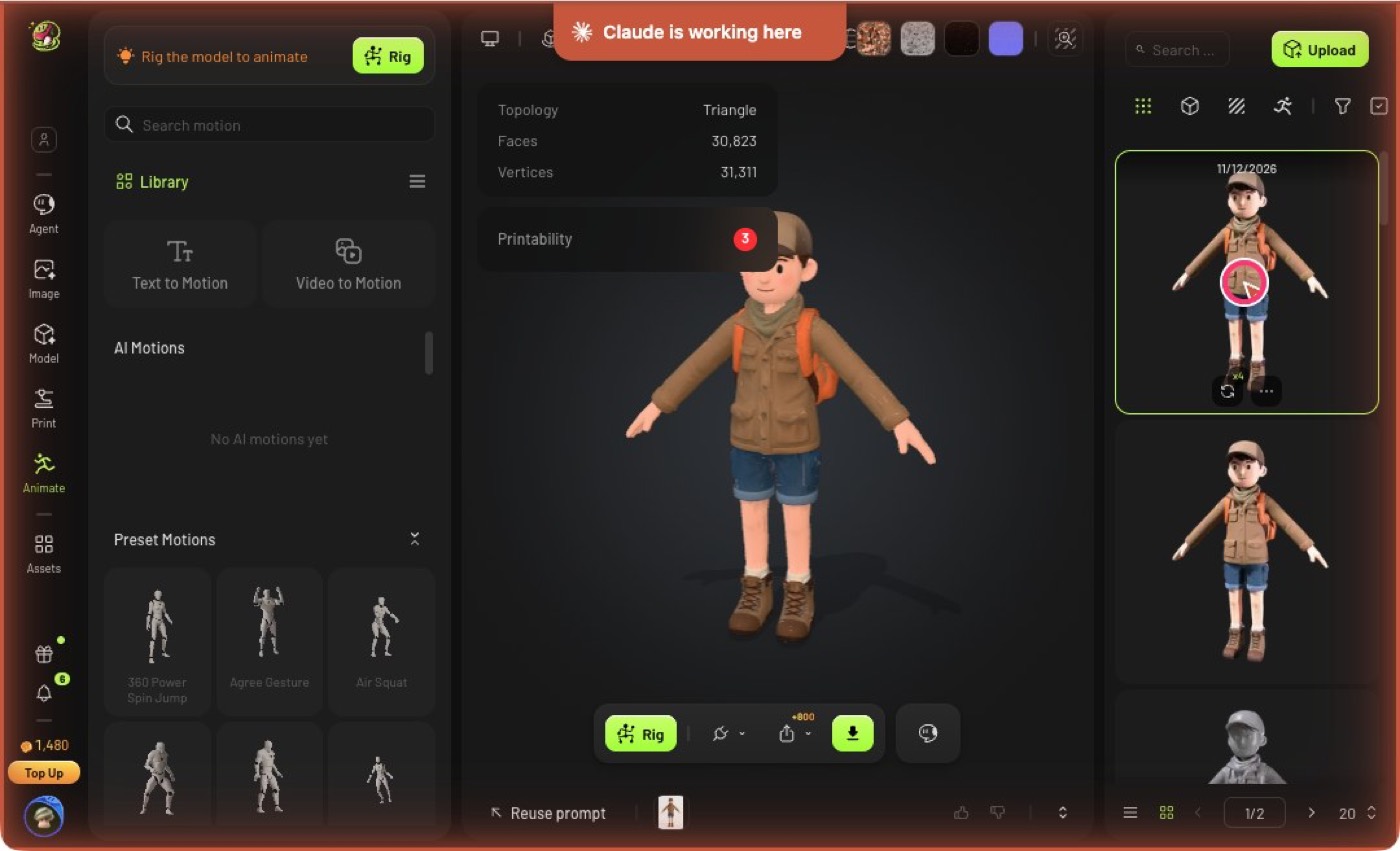
Press Rig again
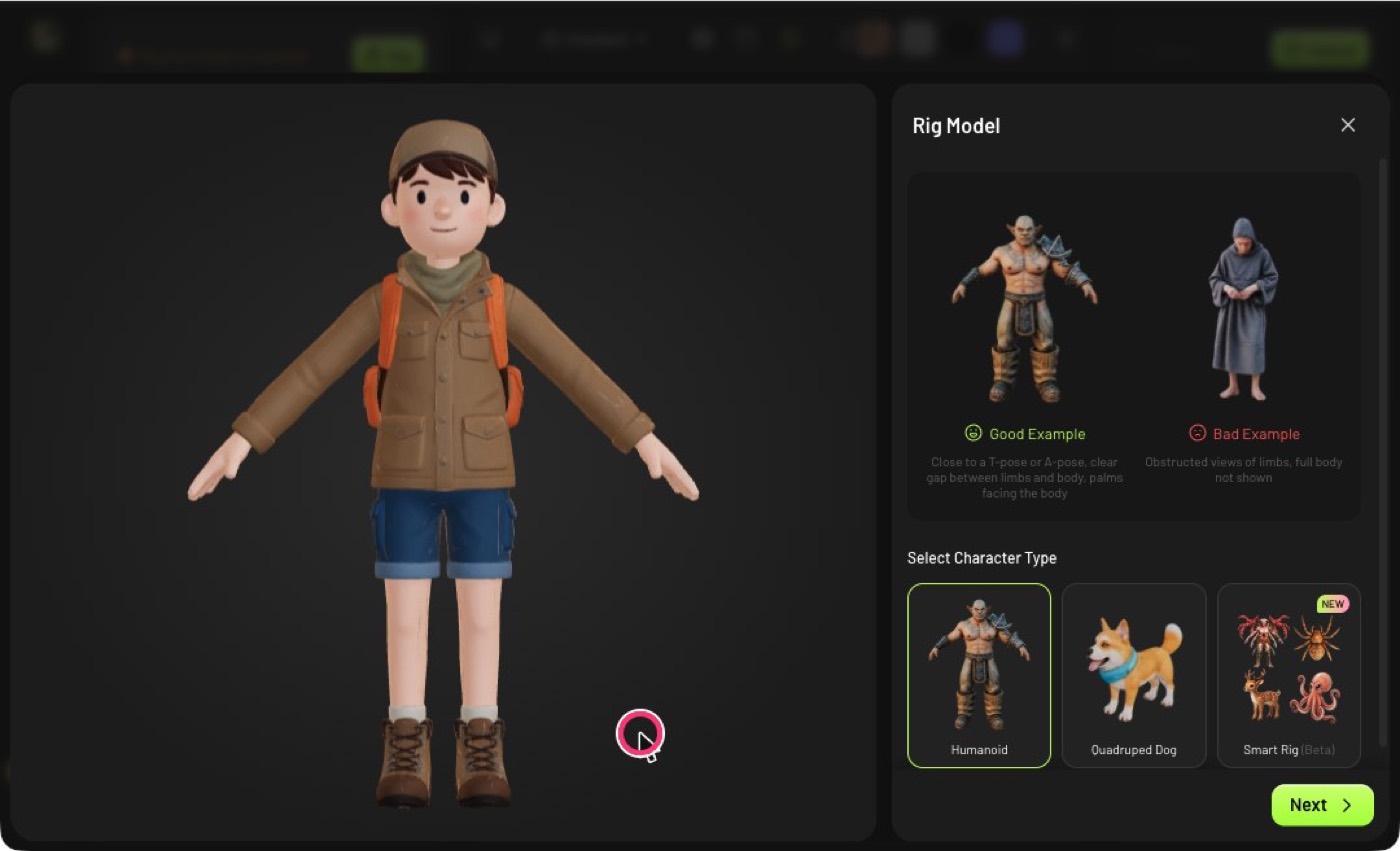
Meshy shows a good and a bad example. Keep Humanoid, press Next
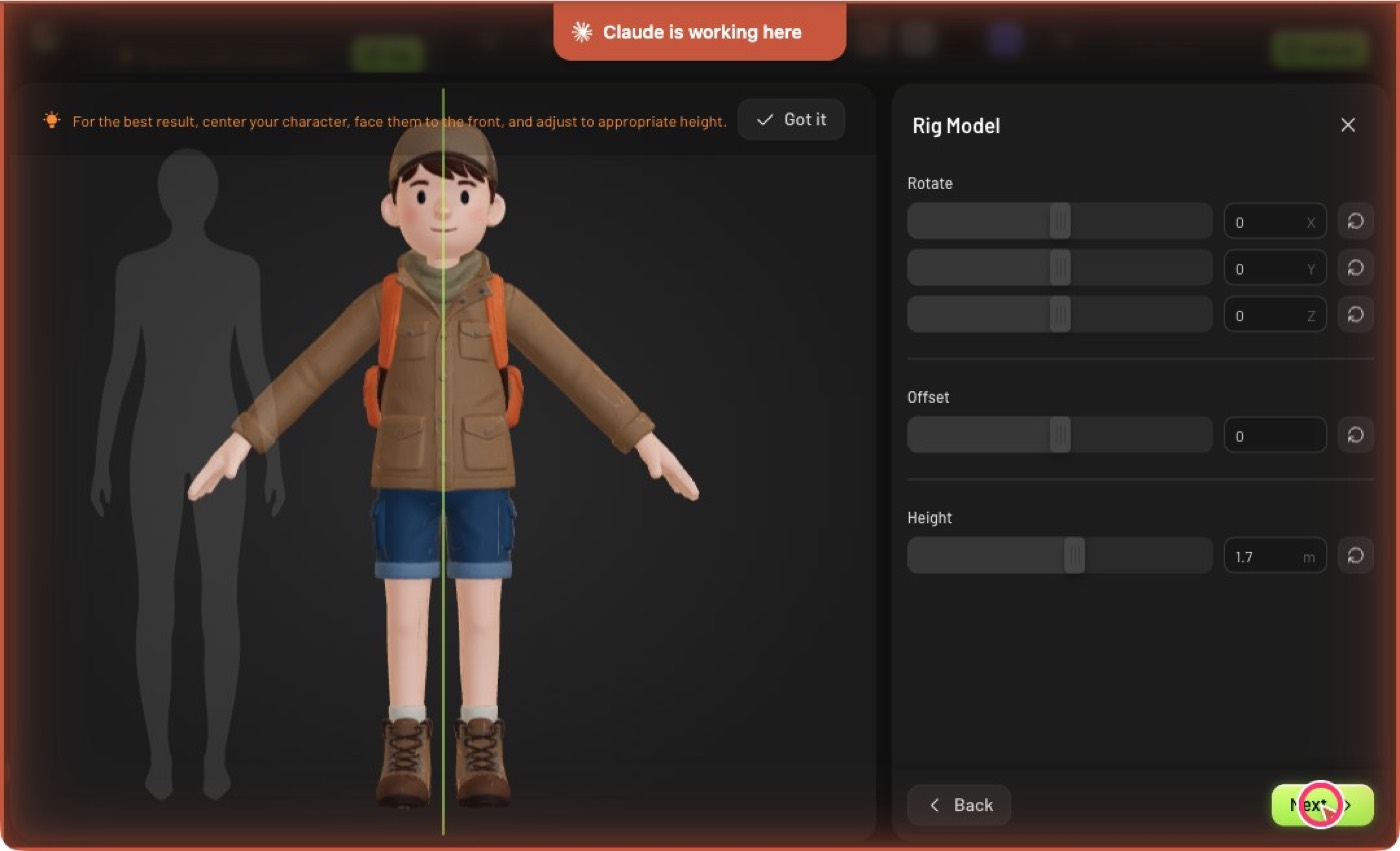
Face it to the front. Set a height, here 1.7 metres. Press Next
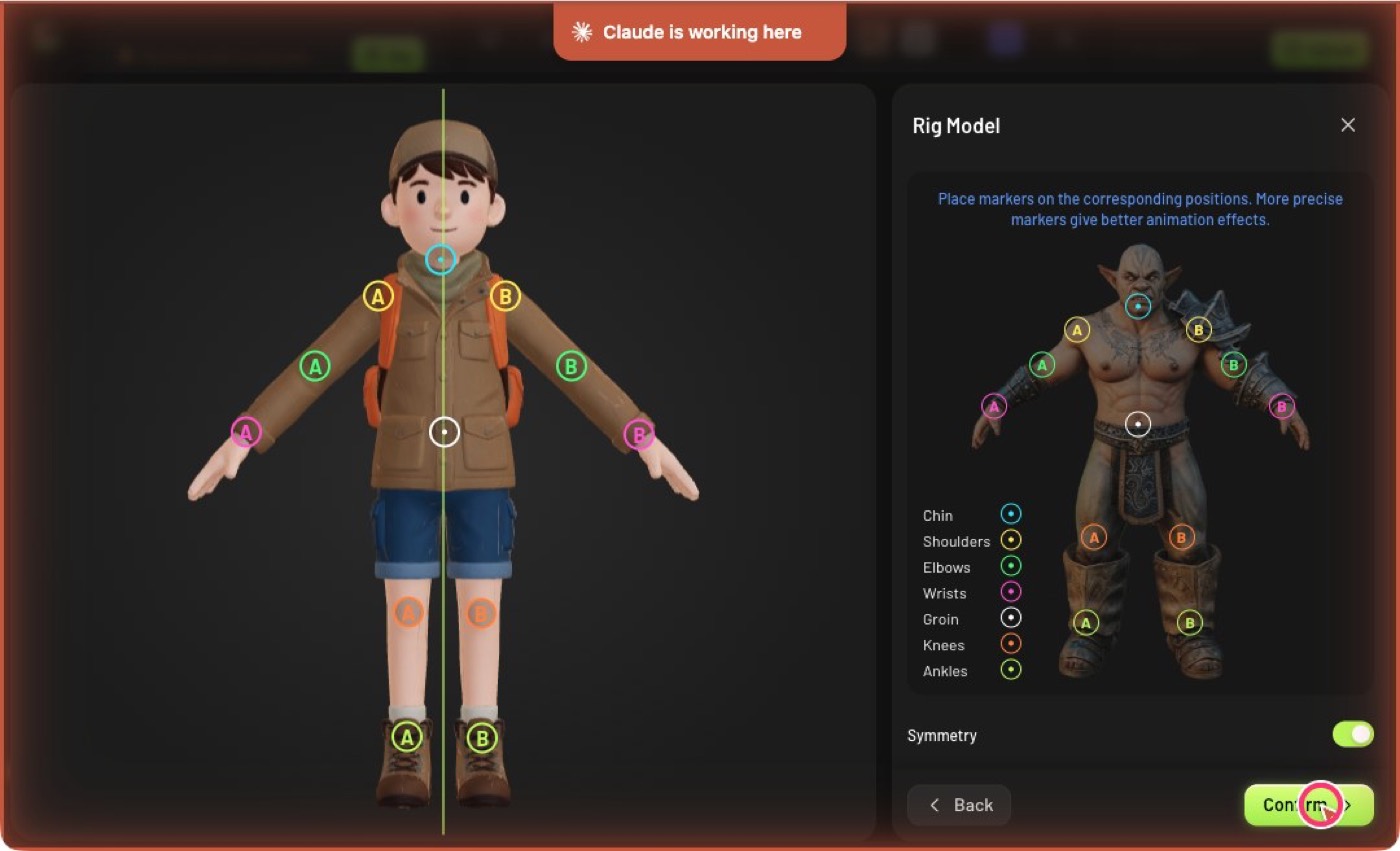
Check the joint markers. The groin marker sits too high: drag it down to the hips
With Symmetry on, the left and right markers move together.
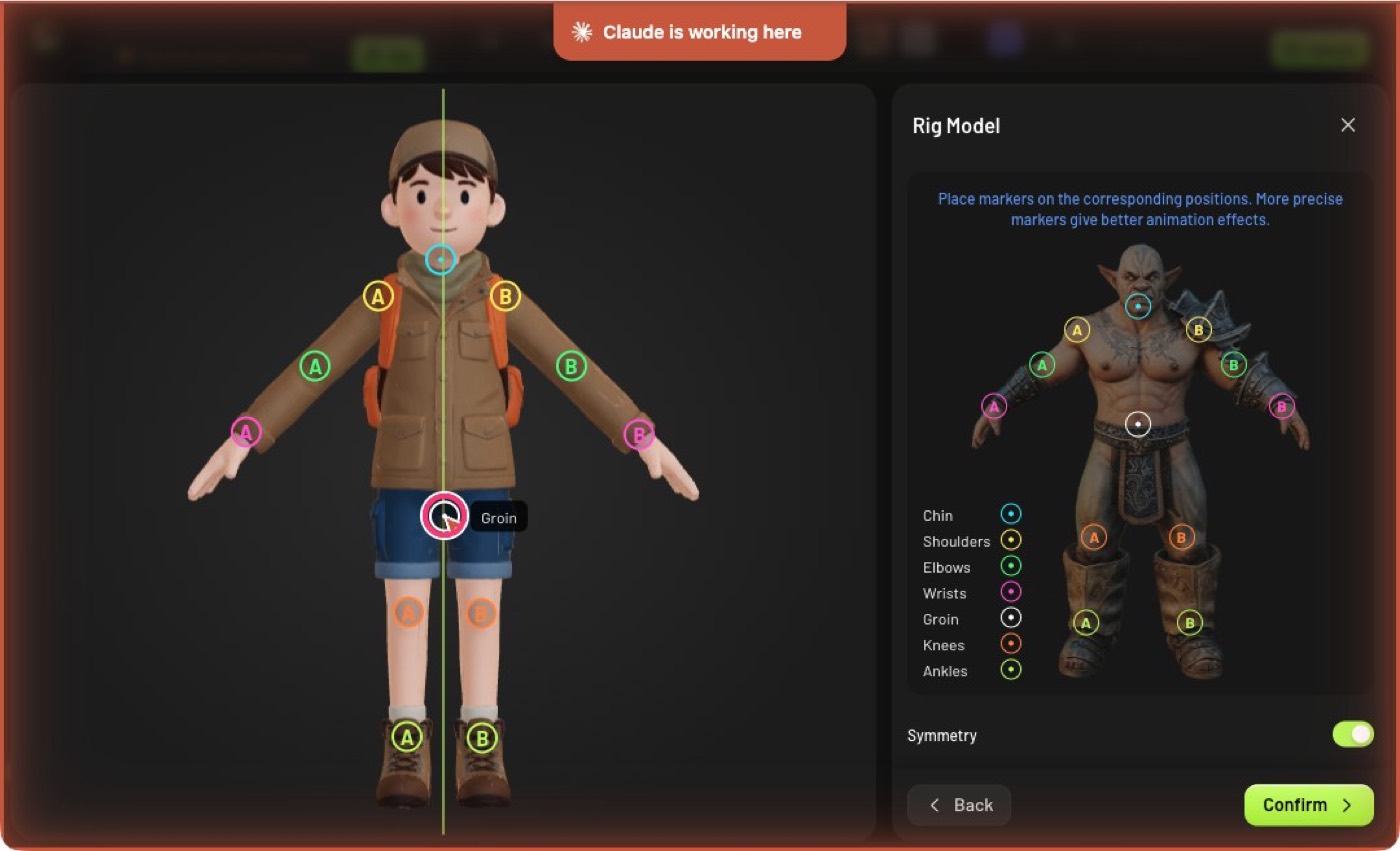
Press Confirm (0 credits)
Rigging took about 50 seconds and worked the first time.
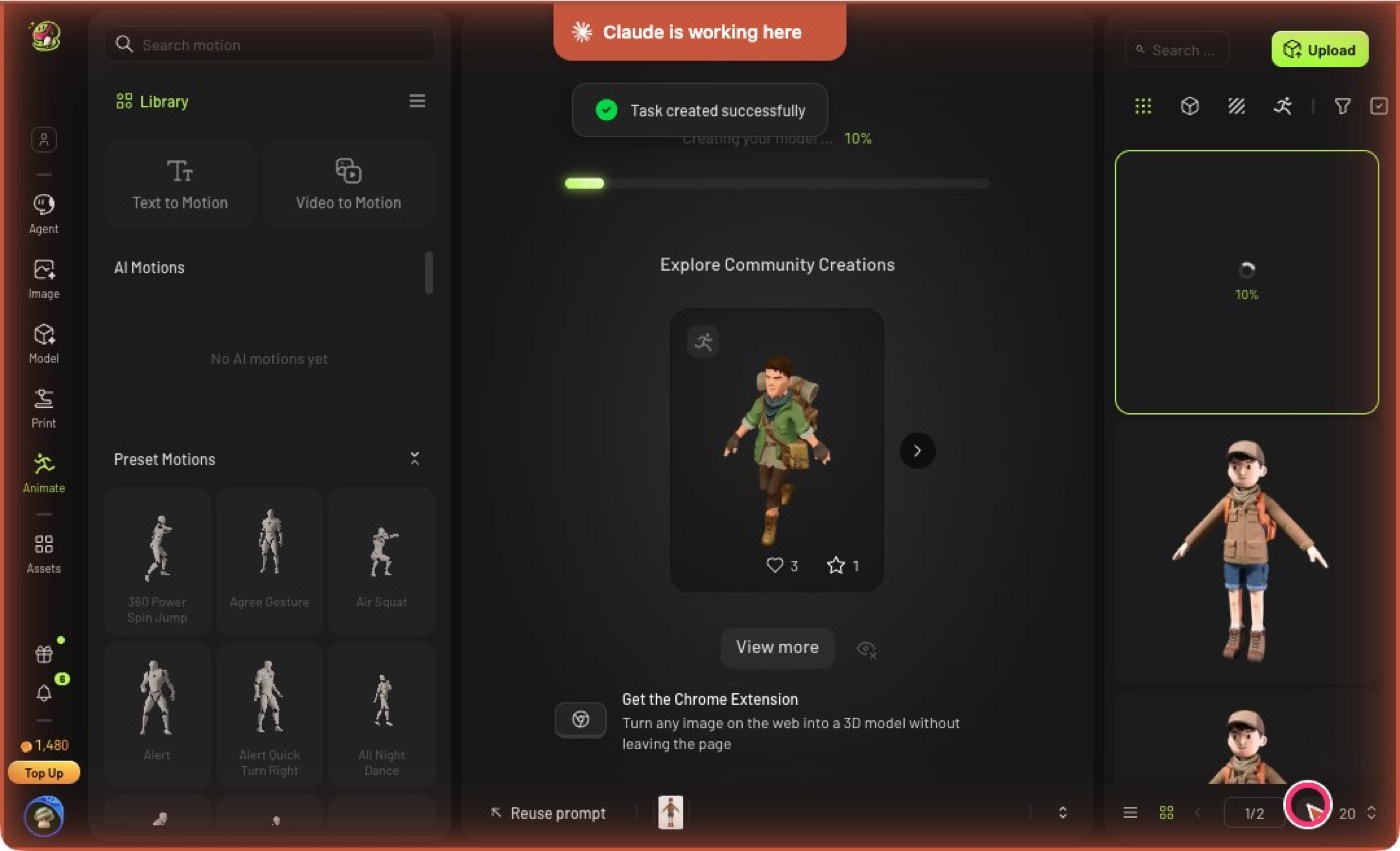
The character moves. The lighter model has about 30,000 faces
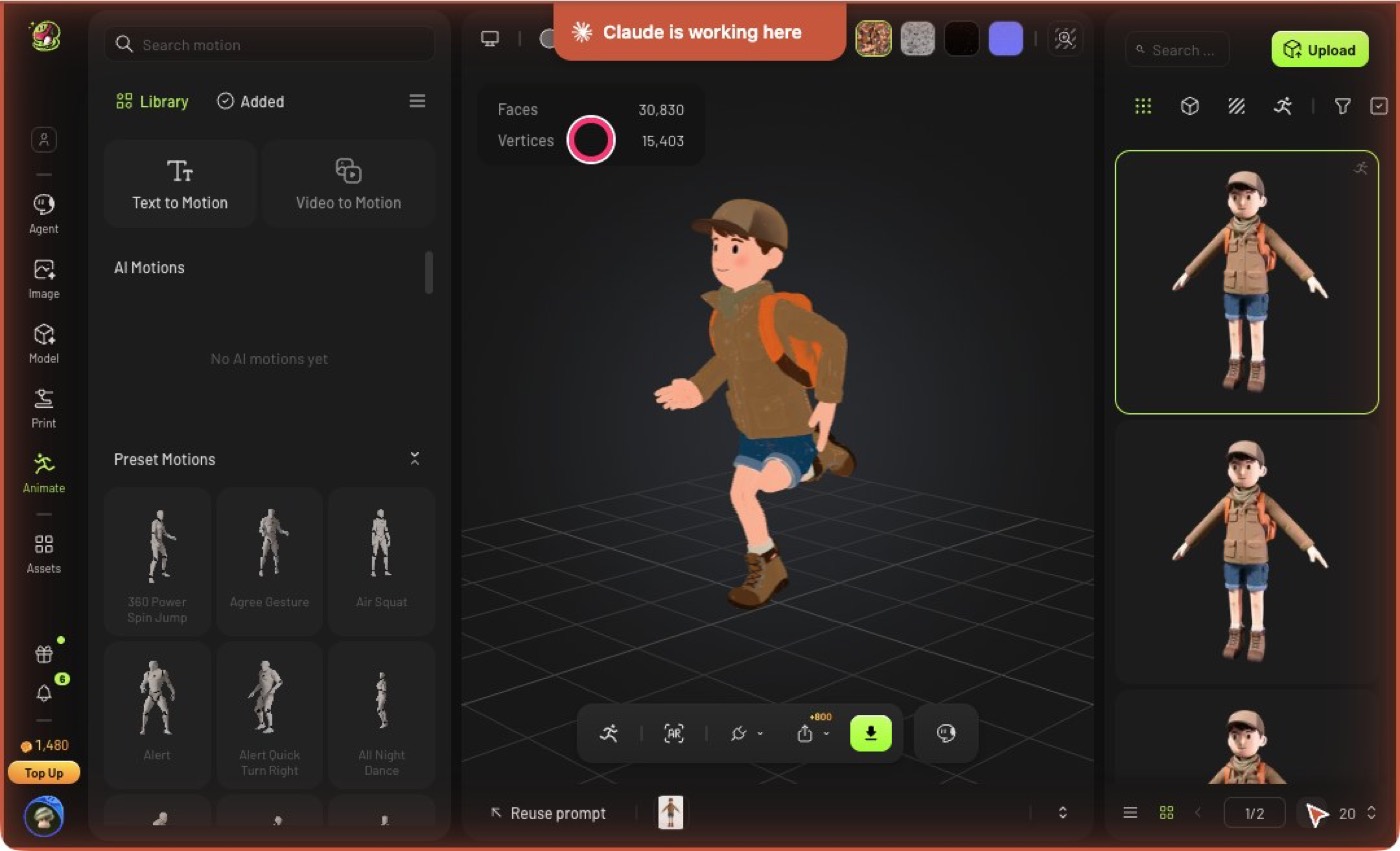
Point at a preset motion and press Add (free ones cost 0 credits)
The motion plays at once. You can add several.
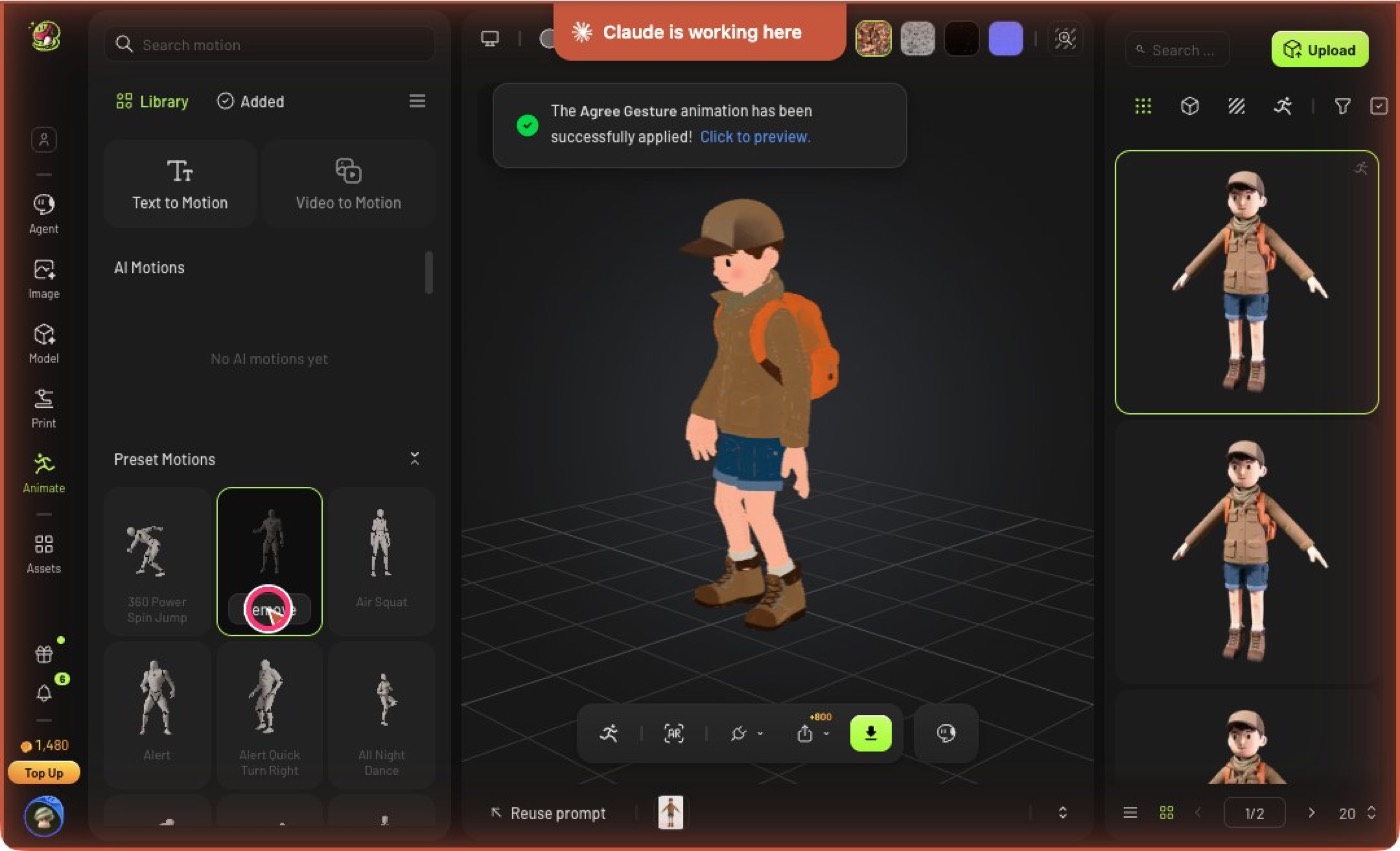
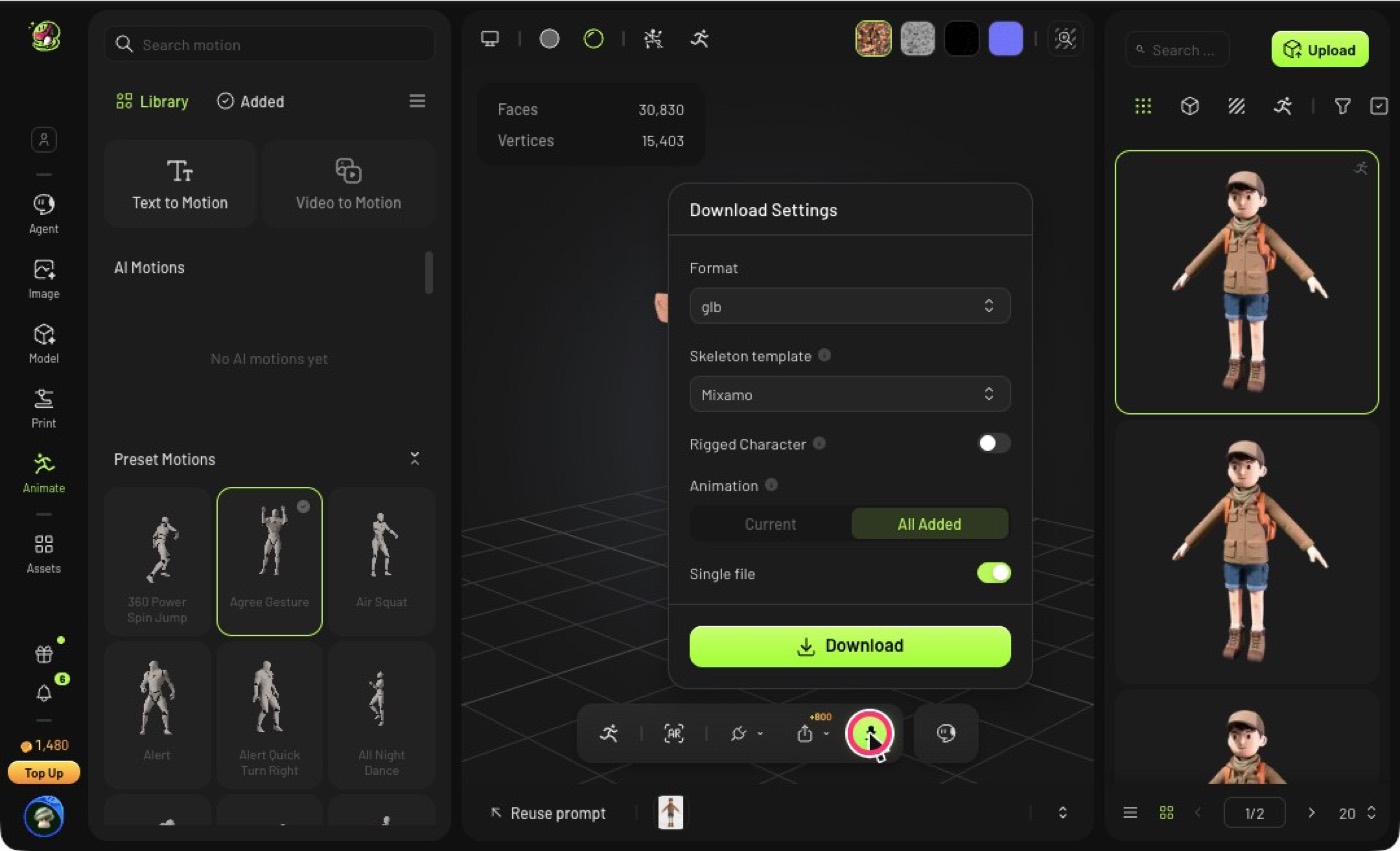
Press the green download button to save it with its motions
Choose glb, All Added and Single file to get one file with every motion.
Short videos from Meshy
These are for after the workshop. Meshy made them, and each opens on YouTube.
- 2:03 min
- How to create 3D models with Meshy in 2026
A tour of the workspace you are using today. - 3:55 min
- How to print detailed 3D models with a higher success rate
What makes a model print well. - 0:36 min
- Auto-repair for print-ready models
How Meshy closes holes before printing.